Sunday, November 10, 2013

PRODUCT REVIEW: Kuat NV hitch 2-bike rack (2-inch hitch model)


The NV on the Roadtrek Agile SS Sprinter RV
A few months back I wrote this review of Kuat's NV hitch bike rack ($549) for my Jim's Tech Talk column. I'm still using and thoroughly enjoying the rack, and regularly get asked about it when we're on the road.

So, to help others looking for a bicycle hitch rack - and especially if you're trying to fit one on a Sprinter-type camper-conversion RV van, I thought I'd post the review here, too, with a few more observations from using it more, and also with their informative video.

If you're looking for a great hitch rack for a car, truck, van or Class-B RV like ours, I think you'll like the NV as much as we do.

A few details
The NV sells for $549 (as of 2013).
The NV rack carries 2 road and/or mountain bikes (accepts all adult-bike tire widths and sizes and kid's bikes down to 20-inch wheel sizes).
By attaching Kuat's $389 2-Bike Add-On, you can carry 4 bikes. But only for their 2-inch hitch/reveiver NV.
Kuat also offer the NV in a model for 1.25 inch hitches/receivers.
Kuat uses aluminum for many parts in the NV, so it weighs a relatively light 49 pounds, making it easier to handle than many hitch/receiver racks.
In order to install the NV on the back of our Sprinter RV, which has a spare tire, we needed an 11-inch hitch extension. We purchased the Heininger 6000 Advantage Adjustable.
One of my favorite features is Kuat's built-in Trail Doc bicycle repair stand.
Kuat Racks
Kuat NV hitch rack

Carrying bicycles in style
A couple of years ago at the Interbike bike show, I was introduced to Springfield, Missouri-based Kuat Racks (say “Koo-At”) and was impressed by their innovative designs and features. I made a note to keep them in mind should I need a rack in the future. So, when we recently purchased Roadtrek’s smallest RV, the Agile SS, which is built on a Mercedes Sprinter chassis with a 2-inch hitch on the back, I checked Kuat’s website and saw that their NV model would fit the bill.


Would the NV fit the RV? 
It wasn’t quite that easy. The Sprinter has two doors on the back and the RV has a spare tire holder blocking the left door. So, there needed to be enough clearance for the rack to fit behind the spare tire. And, I wanted it to move out of the way for access to the right rear door to get into the back of the van. Plus, I needed the rack to be easy to remove so I could open both doors, which requires lowering the spare tire holder that blocks the left door to a horizontal position. To get everything to work, I had to purchase an 11-inch long extender for the Sprinter’s hitch (details above).

Note that rack manufacturers usually warn against, or even prohibit using hitch extenders on RVs. This is because most RVs position the rack well behind the rear wheels where the rack is subjected to massive forces over bumps. But, that’s not an issue on our RV, which is on the shorter Sprinter chassis (19.5 feet long).

Top view
Built mountain-bike tough
Still, since RVing and driving a somewhat oversize vehicle are new to me, I couldn’t help but worry about my bikes on the back. So, I wanted to be sure to get an overbuilt rack. The NV is actually designed around mountain bikes with up to 29 x 3-inch tires, and weighing up to a whopping 60 pounds each.

It will also carry bikes of all sizes in-between down to 20-inch kid's bikes (it comes with an adapter for these). So, I thought it would easily handle my featherweight roadsters and cross-country hardtails.

The reason it can easily carry all these different size and type bicycles is because it’s a tray-mount bike rack, meaning that you don’t have to do anything to your bike to put it on the rack except lift it and place the wheels on the tray. Also, the rack only touches your tires. Nothing holds the frame. And because the NV spaces the bicycles 13 inches apart, they can’t bump into each other or rub, either. These are both nice features for carbon road bikes bikes that can be damaged by rubbing and bumping.

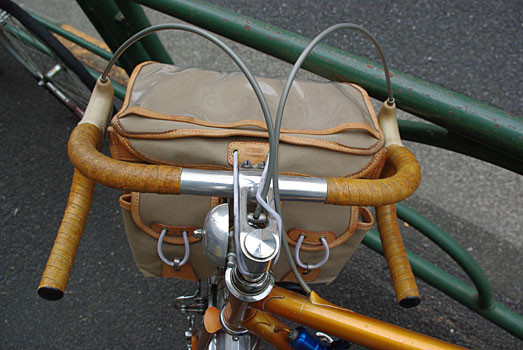
It's also possible to reverse the directions of the trays in case you have interference issues with the handlebars and RV. This was the case with the Roadtrek's spare tire. It was nice to have the option to set the inside tray the other way to get the handlebars away from the spare.

Easy and fast on/off 
To secure bikes to the tray, there’s a telescoping arm that ratchets down to close on the front wheel just ahead of the brake, pressing the wheel down into a pocket for it in the tough plastic wheel holders on the trays. To finish attaching the bikes you simply thread the rear wheel straps into their holders and pull down to ratchet them tight and cinch the rear wheel in place. The whole process takes about 5 seconds for each bike and it’s just as fast getting them off.

In fact, getting the bikes on/off is so easy, it’s kind of hard to believe it works. At first, I kept tugging on the bikes to see if they were really on there and pushing down on the arms and pulling on the straps. But, the connection is super solid and it holds fast. We drove 7,000-plus miles on some of the worst roads in the country, to New Hampshire and back to California with it, and nothing loosened up a bit. And that included a bone-jarring, suspension-abusing stretch of New York's abominable Thruway (never again!), plus a week of searing heat and several days of pounding rain.

No-tools rack tightening and removal
The way the bikes attach to the rack is similar to other tray-mount hitch racks, but the way the NV attaches and stays tightly fastened in the hitch is advanced and quite an advantage. Instead of the typical bolt-on arrangement, on the NV there’s a large nylon knob on the end of the rack’s main support tube (watch the video to see this).

By simply tightening this knob with your hand, a cam inside the rack presses an oversize ball bearing mounted in a pocket on the NV’s insertion end into the vehicle hitch taking up all the slack between the two and securely fastening the rack. No tools are required and though I kept checking this knob across the country, it never loosened and the rack stayed tight.

It was also easy to loosen the knob and remove the rack when needed. The rack remains tight when you loosen the knob, but once you bang the knob with your hand, the cam lets go and the rack comes right out. This is when you appreciate how much aluminum is in the NV because at only 49 pounds, it’s significantly easier to lift, carry and handle than the usual 100% steel hitch racks that are so common.

Folds up and down
I only had to remove the rack because of the spare tire holder. If that wasn’t there, I could have used the NV’s folding feature. It has a giant spring-loaded quick release lever on the bottom. You pull it open and lift or push down and the rack snaps up to its folded position behind the doors or down so that a tailgate can be opened, or in my case, my right rear door.

Being able to fold the rack up on the back of our RV meant we could still parallel park in a standard space. With the rack down and bikes on it, the RV was a little too long for that.

Built-in security
To protect your precious cargo, the NV comes with a locking hitch pin so the rack can’t be stolen from the vehicle (because we used an extension, we needed a locking hitch pin for that, too). And there’s an integrated cable lock that is connected to the wheel trays and stores inside them, too. You just pull it out, thread the ends through the bike frames and wheels and lock the ends together to secure the bikes to the rack. The keys for the cable lock and hitch pin are the same, which is nice.

Unfortunately, my cable lock developed some issue and wouldn’t close the second time I tried to use it. To safeguard my bikes I simply purchased a 6-foot OnGuard cable lock and that worked fine. Kuat quickly sent me a replacement cable lock under warranty, so the rack's built-in lock is now working again.

Kuat’s clever Bottle Lock
I wouldn’t have had to purchase the OnGuard lock if I had been smart and brought along Kuat’s $29 Bottle Lock. They sent me one to try but I didn’t think I’d need it and left it home. It’s a coiled 5-foot cable and lock built into a standard bottle so it fits nicely in a bottle cage. To lock your bike, you just pull the end of the cable and it unravels (the inside of the bottle spins, the outside doesn’t) to full length. You then lock its end into the top of the bottle. The keys are stored in a compartment in the bottom of the bottle.

The Bottle Lock does not hold water, but it’s a convenient, lightweight and cool lock I could have used on the rack and will use riding around town. It comes in Black, White, Pink and Rasta .

Kuat's Trail Doc repair stand
Kuat thought of everything 
The NV’s ease of use, light weight and secure bike and vehicle attachment make it a wonderful rack to use. But it has another trick and one I had to have: it features their Trail Doc repair stand!

When not in use, this sits at the end of the rack’s main support. To use it, you remove the bikes, fold the rack up, loosen the Trail Doc’s quick release and extend it up until it clicks in place.

Voila! You have a very nicely constructed bike repair stand that holds bicycles by the seatpost or top tube and lets you work right there by your vehicle like a pro. For me, it means I no longer have to bring along a separate repair stand and one less thing in a small RV is a great thing.

Rack envy 
Finally, as impressed as I am with the design, features, function and quality of the NV, I am just as impressed by its appearance. When you buy a fancy vehicle it’s hard to get yourself to put anything on it. But the NVs lustrous grey and gold finish makes it a stunner and a few people on our trip actually came up and asked us if the rack had been custom made by Mercedes for our RV. That’s quite a compliment to Kuat’s design, and perhaps why they named it what they did.

Friday, September 13, 2013

HOLY GRAILS: 1974 Masi Gran Criterium, continued

Back To The Future


In part 1 of this great bicycle project, I reran a story I wrote for my Jim's Tech Talk column on RoadBikeRider called Basket Case, that told of my finding a quite beat-up 1974 Masi Gran Criterium, and deciding to go ahead and get it restored. 

It was a tough decision because somewhere along the line it had been run into a parked car or curb buckling the top and down tubes. Plus, all the original paint and decals were gone, an awful spray-can finish had been applied and the parts had been removed and dumped in a milk crate to rust away.


Yet, the more I looked at the frame with the magical Masi M cutout in the bottom bracket, the lovely lugs that taper into the tubes, the clean dropout finish work and the extraordinary twin-plate fork crown, the more I felt I had to bring it back to its former glory. 

I also had heard that that crown was sometimes a sign of a frame built by Masi founder and legendary framebuilder for the pros, Faliero Masi. This is part 2 of that story - which also appeared in my column in RoadBikeRider.


The greats rode Masis

Masis were among the most respected racing bicycles ever built and even today roadies who raced them back then will tell you that nothing compares. But, it’s the pros who won on them that really made their reputation. 

Just a few of the big names include, Eddy Merckx, Tom Simpson, Fausto Coppi, Felice Gimondi, and Jacques Anquetil (note that their Masis were painted to look like the team sponsor bike brand).


My model, the Gran Criterium was also the red rocket, character Dave Stoller rode in the best cycling movie of all time (ATMO), Breaking Away - adding more fame to the Masi name.


Masi worked out of perhaps the most amazing framebuilding workshop ever, which was and is still located in the Vigorelli velodrome in Milan, Italy. Today Faliero’s son Alberto continues the family tradition building frames there, though since the Masi name was sold, his frames now go by the brand Milano 3V. Masi aficionado’s Bob Hovey and Greg Fletcher have some nice virtual tours: http://bhovey.com/Masi/MasiVisit/  and http://masi.gregfletcher.net/masi/vigorelli/vigorelli.html .


Masi USA
Faliero must have been a visionary, too, because right as the huge bike boom of the seventies was about to hit America, he came here and opened a USA Masi division in Carlsbad, California. And, the fact that Masi was here in 1974 and not in Italy, meant that my frame might also have come out of that shop.


All these things and the desire to be able to own and ride such a famous marque (the frame is a 57cm - the perfect size), made me decide to send it off to an expert who could help me decide whether it was worth saving.


The Masi goes home
That would be Joe Bell of Joe Bell Bicycle Refinishing http://www.campyonly.com/joebell.html, because Joe has restored lots of Masis to perfection and his work is concors d’elegance level.


I called Joe first to see if he was interested in the project and he said that not only would he love to repaint the frame, but he would also show it to Brian Baylis, who was helping build Masi frames in those early days in Carlsbad, where mine was probably built.

That’s all I needed to hear and I boxed up the frameset and sent it off to Joe’s Southern California shop.


Only two days later Joe called to say he had already received and opened the box, inspected the frame and shown it to Brian.

I next expected to find out whether it was worth saving and how much it would cost. So, I was surprised when Joe told me that he and Brian had already decided the frame had to be saved and even more surprising, that Brian had already taken it back to his shop and started repairing the crash damage 

See Joe's note and sections of the replaced down tube in the photo!


Great news
Joe went on to explain that in their estimation the frameset was built in early 1974 in Carlsbad and that Brian himself might have helped build it. Equally exciting was that Brian believes the fork was probably raked by Faliero Masi himself, who was training the other builders in his new shop at the time how to build his frames.

With this news, it was a complete no-brainer for me to send Joe a $1,000 deposit to commence the restoration (with frame repair, paint, chrome, decals, a Silca pump painted to match and Joe's super-careful packing and shipping, the total cost was $1,890). 

[A quick aside: yes, I realize that I might have been able to find a rarer or better Masi for the same money. But it wasn't about the money or finding a better one. This Masi found me. I felt the same responsibility to rescue it that Joe and Brian did. There's tremendous satisfaction in resurrecting a survivor like this and that's what I was interested in, rather than trying to buy the ultimate Masi, which would be an entirely different thrill.]


I’ve included a few photos that show Joe and Brain’s fabulous work. I’ll finish the Masi restoration story when I get it fully built and back on the road - hopefully with some riding impressions.


I’ve already located 1973 Campagnolo Nuovo Record components and vintage road bike expert, Bob Freeman up at Elliott Bay Bicycles in Seattle, was kind enough to sell me a pair of the especially rare Martano rims, which were what it had when new. 

Visit Bob’s site and scroll to see some of his impressive restoration work http://elliottbaybicycles.com/restoration/


In the front view photo you can see the twin-plate crown, which requires more skill to build with since it’s comprised of multiple parts. A standard crown is a single piece that the fork steerer tube and blades fit into. This twin-plate crown has a top and bottom plate and the blades and steerer pass through the bottom plate before the steerer passes through the top one and the blades fit inside the top plate. 

There are also two reinforcing tangs on the inside of the blades that also extend through the twin plates (the yellow dots are decorative braze-quality check holes in these tangs). 

Even if you've never built a frame, I think you can appreciate the challenge of getting that many pieces assembled, aligned and brazed together correctly. Especially since, on many of the best steel road bikes back then, which had the much more basic crown design, you would see misaligned crowns (very noticeable when you're riding and looking down). The Masi's is perfect.


One of the reasons I sent the frame to Joe Bell is because I've seen how he lays down an impossibly thin paint finish. It's extremely high quality, durable and lustrous yet what jumps out at anyone who loves handcrafted frames is how he keeps it so uniformly thin.

In fact, sometimes framebuilders choose to paint their frames with see-through clear coats to ensure you can see their brilliant craftsmanship. Joe gets this and gives you the best of both worlds: a stunning finish with all the originality of a new 1974 Masi but the ultimate coat that reveals the framesmith's exquisite detailing, too. 

You don't want to just look at this bike, you're drawn in to inspect it closely and end up running your fingers along the joinery marveling at the artistry.


The frame is made of double-butted chromoly steel, probably Reynolds 531 because Masi had a falling out with Italian tubing make Columbus or so I’ve read. I've never actually ridden a Masi Gran Criterium in my frame size, but I'm going to savor every step of the build and not rush it.

Thanks to my friend and fellow Masi lover Chuck Schmidt of Velo-Retro filling me in, I've rounded up most of the correct parts to build mine close to original. 

I'm in need of the right saddle, though, a Cinelli Unicanitor #3 would be good, I believe. If you have one you'd part with please let me know. Maybe I have something you need for one of your projects.

I'll close with a photo of the signature M cutout in the bottom bracket, neatly highlighted by Joe in yellow. When the Campagnolo BB is installed its translucent plastic sleeve should accentuate the cutout nicely. Masi sometimes used similar cutouts in the chainrings, also edged with yellow, and I've seen Masis where the ends of the top-tube cable clip bolts were highlighted with dots of yellow paint and other yellow details, too, to make the bicycle that much more special.

Thanks for reading!
Jim


Wednesday, April 24, 2013

SHOPTALK: Making a bike workshop toolboard

My toolboard
For you mechanics out there, here's a popular subject I covered in my Jim's Tech Talk column in RoadBikeRider. It's on toolboards and tool organization, so it's great for dialing in your home shop for more efficient bicycle maintenance and repair.

It came to mind as a good topic because recently I was working in our remote office instead of my home office here in Santa Cruz, California. I was there to set up a bicycle workshop.

Over the years in that office we collected a good basic assortment of bike tools, and those that fit are neatly stored in a variety of different size toolboxes. For a workbench, we’ve been using a giant oval table made for staff meetings. It’s plenty big enough for any bicycle project but not the best approach since it has to stay clear for meetings and office work. We have a few bicycle workstands.

Fortunately, we found a corner to turn into a pro bicycle work area and I got to design it. This was one of my responsibilities at the bike shops I managed and also at Bicycling magazine, so I enjoy it. Self-promotion alert: I even wrote a popular e-Book that’s sold in RBR’s bookstore about how to create your own shop at home titled Your Home Bicycle Workshop.

Advantages of toolboards
As I was building our new shop I was thinking how useful even a basic toolboard is, and thought I would explain more how to make one. Step-by-step instructions follow. But first, let me list a few reasons why so many bike shops use toolboards.

Convenient and efficient bike repair: a good toolboard holds frequently used tools right at hand; you never have to search to find the right one

Helps prevent lost tools: as long as you put them back, your tools are always right there, and at a glance you can tell what’s missing and go look for it

Keeps the workbench clean: again, as long as you put the tools back, your bench stays available for whatever you’re working on

Protects tools: bike tools can be costly, and hanging them on a board prevents them from getting beat up by other tools in a box or a sliding drawer

A nice toolboard impresses your cycling buddies: just beware the tool borrower - better to fix it in your cool shop than let them take your tools with them

Concept and location
A toolboard is just a place to hang your tools. Common materials are plywood and pegboard, and anything that makes it easy to hang tools. You only need a size large enough for your FUTs (Frequently Used Tools). The rarely used items should stay in a drawer or toolbox so as not to clutter your board, making it more difficult to select the right tool and/or take up all your space.

Typically, your toolboard will be placed on the wall close to where you work on your bike. Or, if you have a work surface, table or workbench, it can be attached to the wall above it. It’s best for it not to be any taller than you can easily reach, and not too long, to avoid having to walk, or stretch, or stand on something to reach the tools. Remember, these are FUTs, so you’ll be retrieving and replacing them often during your bike work.

Plywood is my preference
For materials, I much prefer plywood to pegboard. With plywood, you hang your tools on 6-penny finishing nails that you drive into the wood wherever it works to hang and space your tools.

With pegboard you buy the appropriate pegs and tool holder gizmos to hang your tools. Plus, you have to follow the pegboard spacing, which means you can’t end up with perfect spacing for oddly shaped tools, which nicely sums up many bike tools.

Note that the step-by-step instructions below assume you’re using plywood and nails, but I do describe at the end how pegboard differs.

Making your toolboard - by the numbers
Anyone can make a toolboard and benefit from having one. You don’t need to be an expert mechanic or even have lots of tools. This approach to toolboard design will work for anyone. If you don’t have lots of tools to hang right now, you can easily follow these directions to update your toolboard as your tool collection grows.

1. Lay it out. Place a large piece of sturdy cardboard on top of your table/bench (even if you only use a makeshift table as a workbench, it will work for this step). Most bike shops will give you a bike box, and cutting one side off will work for this. Or use what have you. It only needs to be large enough to lay out the tools you own currently (read on).

2. Find and lay out your tools. Dig through your garage, basement, car, bicycle bags, etc., and find all the tools you use for your bike. This includes bicycle-specific tools and regularly used household tools, like pliers, screwdrivers and scissors. For now, lay these tools flat on the piece of cardboard you placed on your workbench/table.

3. Try it out. Over a few days/weeks, do some bike repairs/maintenance using the tools on your cardboard-covered bench. As you work on your bike(s), pay attention to which tools you use, and how often you use them. Refine your tool selection by removing any that you never use and moving tools that you use together near each other (like pliers next to cable cutters, adjustable wrench next to cassette lockring remover, crankarm remover next to bottom-bracket tools, etc.). Also, place the tools and groups of tools used together -- that you find you use most often -- toward the center of your workbench. For example, 4, 5 and 6mm allen wrenches or a folding allen wrench set should go toward the center, since allens are used so often on modern bikes.

4. Commit to it. Once you know what tools you like and feel good about how you’ve organized them on the cardboard, take a little time to lay them out so they’re spaced nicely. Then think about if the cardboard was held against a wall, where nails would need to be driven for the tool to hang straight and not fall off. You can hold the nail and try the tool on it and figure it out pretty quickly. Once you know, mark the nail locations on the cardboard to hold each tool. Then, either draw a quick outline around each tool on your cardboard tool template, or take a photo of the entire cardboard toolboard with tools in place, to refer to later.

5. Finish your toolboard. All that’s needed now is to remove the tools from your cardboard template. Next, hold the template against the plywood piece that’s to become your toolboard. It needs to be secure because you’re going to drive nails into it. Now, simply drive the nails through your nail marks in the template, pull the template off your plywood toolboard and follow your digital “map” or look at the tool outlines on the template to hang your tools in the right places. So that you know where every tool hangs, you can outline them with a marker on the plywood toolboard now. Or just refer to your photo. (I prefer to memorize mine to keep the toolboard cleaner looking.)

Tip: A simple and handy tool holder can be made from a section of 2 x 4 lumber. You can see these in my toolboard photo on the right and left. Drilling different diameter holes across the edge lets you easily hang tools that don’t hang well on nails, like pliers, ratchet handles, individual allen wrenches or sets, etc. Notice that I also use the front of the 2 x 4 to hang 3 1/4-inch drive ratchet handles with a 4mm, 5mm and 6mm allen sockets, respectively, since those tools are so frequently used.

Pegboard notes: If you choose pegboard, you don’t need to drive any nails through your template. Instead, use it as a reference for figuring out where to place the pegs, and which types of pegboard holders to use to place the tools on the pegboard where you want them. I find that pegboard and pegs/holders for it take more experimentation but you can always get it right eventually. You can also use custom holders on pegboard, like my 2 x 4 special holders mentioned above. So think outside the box and don’t feel restricted by what’s available from the pegboard makers.

What to do if you don't have room for a big shop and toolboard
Not everyone has the space for a full bike-repair station. Take, for example, RoadBikeRider owner/publisher John Marsh. I envisioned him enjoying a spacious workshop in the 3-car garage of his Georgia plantation. But, no. It turns out he has neither a plantation, nor a garage!

John emailed: “I’m completely jealous of you and all other riders who have a good spot for a workshop. I have a carport, not a garage, and a too-small shed in my backyard, at least 100 feet from my back door. I do my maintenance in my office, where I keep my bike. Not at all ideal, but it’s the best I can do.”

Alan’s toolbox approach
Another RoadBikeRider author, Alan Canfield wrote me about his space crunch. He said, “As an amateur woodworker, I appreciate good tools and tool organization. I've unfortunately covered the garage wall space with shelves and have to keep my bike tools in a small Craftsman drawer toolbox that’s packed full!

I appreciate the suggestion for using plywood and nails to maximize the spacing on tools. I might try to adapt and make a plywood toolboard that spans the back of my workbench below the overhanging shelf.”

Toolbox tips
Alan’s use of a toolbox for a tight workshop is one way to work efficiently in a small space. It also lets you easily move the tools if your workspace is constantly changing. That’s essentially the setup pro mechanics use at races. So you can use some of their tricks to make working this way even more practical.

Here are some toolbox toolkits that get you started with a box and an assortment of bicycle tools:
Park Tool Home Mechanic Starter Kit
Park Tool Advanced Mechanic Kit

The pros often use a special electrician-type suitcase for toolboxes. These actually have miniature toolboards inside called palettes, and usually two or three of them on top of each other. You slip your tools into the holders on the palettes and they stay organized and easy to access. Larger tools go in the main toolbox compartment in the bottom.

That's Park Tool’s Tool Case in the photo.
Here's Pedro's Master Tool Kit, a mechanic's case packed with tools.

Color coding
To make a drawer-type toolbox more efficient to work out of, I recommend marking the drawers and tools. First, organize your tools the way you would for a toolboard, putting tools that are used together in the same drawer, putting the most frequently used ones in the easiest to access part of the toolbox and making sure every tool is easy to get at and put away (don’t jam the box so full it’s hard to open/close it or the drawers).

Once everything is in the box, mark each drawer with a different color and then each tool that goes in the drawer the same way. I do this with colored electrical tape, putting a strip on the outside of the drawer and then I wrap a band of tape around the tools. That way, after even the most complicated repair, it only takes a minute or two to put every tool back in the right drawer. Plus, you quickly learn which tool is in which drawer, which makes working with them easier.

Tip: I love those monster double-wide, almost ceiling-high toolboxes the TV car guys have, like Edd China's on Wheeler Dealers, but they take up a lot of space, cost a small fortune and are much larger than you need for bicycle repair tools. I recommend sticking with a toolbox that fits your space and that you can carry when it’s full of tools.

Smaller toolboards
If you commit to a toolbox for some of your tools, you can often design a small toolboard that’s just right to keep your most commonly used tools readily at hand. It can be tiny and still provide a nice workspace that looks professional and makes it more fun to work on your bikes.

At one of my bike shops, I had more mechanics than workbenches, and I had to put one of them in a corner in the attic (she liked it - honest!). For this, I used one of those butcher-block-top rolling kitchen carts for her bench, attached a piece of plywood to the back as the toolboard, and put a small toolbox on the bottom shelf of the cart for larger tools. Park Tool makes a folding portable workbench that's handy when you can't leave your home shop setup for long and for when you want to take your shop on the road to bike events.

There are all kinds of ways to fit toolboards in small spaces like this. I’ve seen some that slide or fold out of the way, for example. This isn’t hard to engineer since the tools and board are almost flat, and the tools will stay in place as the board is moved. So think about your space and be creative to find a fun solution.

Tom Anderson’s workshop
Speaking of creative solutions, here are a couple of photos Tom Anderson of Portland, Oregon, shared of his compact workshop and toolboard.

Tom explained, “I live in a high-rise condo building so there’s no workshop space in our garage. However, each unit has a storage room on the top floor, which is where my workbench is located. The rest of the limited space is jam packed with years of accumulation and resembles Fibber McGee’s closet on steroids. See the second photo.

The workbench is a 4.5-foot-long Sears metal bench with a fiberboard top. I doubled the height of the metal pegboard section. The white foam block contains small flat, Phillips, and Torx screwdrivers that are color-coded by type.

“I mostly work on my own bikes (six and counting) and occasionally bikes of friends and neighbors. I got a mechanic certification from UBI several years ago and worked summers in a friend’s bike shop for four years. I also volunteer at a local non-profit shop, the Community Cycling Center. We just had our annual Holiday Bike Drive where we provide 500 helmets and refurbished bikes to kids from low-income families.”

Thanks for sharing your workshop tips, Tom, and great job fitting such a fully functional shop in such a cramped spot, and volunteering your skills to help out your community.

Masi bicycles' setup
In closing, here's a photo of Alberto Masi's workbench, of Masi bicycles. No toolboard here. Instead there are only the tools and lubricants needed; laid out for easy, fast access. Note the drawer's beneath the bench for stored and organized tools used less often, but still right there, nearby. On another bench is a Campagnolo toolbox with more tools neatly organized and stored. I assume that his shop is organized in stations, with separate benches and tool assortments for each step of the bicycle build process. So, this bench is probably for final adjustments and another is for frame preparation, etc.

This photo is from the vintage road bicycle website Classic Rendezvous.
Alberto Masi's tidy tool layout
Have fun!
Jim

Tuesday, March 12, 2013

BIKE VIDEO: Danish Police Hug Bicyclists, to Give Them Helmets

Fellow riders, here's a short video that shows a cool way to encourage helmet use. The hugs could help make the connection for the riders that wearing a helmet is about protecting the ones you love as much as it is about protecting you. That's a very clever approach to giving away helmets. I'm sharing it to pass along the idea.

Link to the video: https://www.youtube.com/watch?v=lHc-MzTeEcU

Wednesday, February 27, 2013

BIKE RESTORATIONS: Making a René Herse bell

Here's a quick update on my René Herse project, bicycle friends. If you missed it, here's the first story about this holy grail of vintage bike collectibles, how I got it and how I plan to get it road-worthy again. A fun detour is this great gallery of René Herses.

One of the first things I wanted to replace was the missing bell on my Herse. These French randonneuring bicycles were street-legal so they had to have full equipment like lights and bells. Like a lot of others I've seen, my Herse had a bell mounted to the stem, but it had gone missing by the time I received the bike.

The handmade Herse stem, machined from a block of aluminum, has a threaded hole in the left side to receive the bell. You can see an example in the photo below. It's nice how the bell floats next to the stem like it was meant to be there, and with no ugly clamps or bolts and nuts. It's also easy to hit the striker with your thumb from a couple of  hand positions.
Most René Herse bicycles include a built-in stem bell. The handlebar bag shown is by Guu Watanabe Bags
The bell is conspicuously absent on my stem but the threaded hole is there

An aluminum Crane bell from Japan resembles the original

Simply unscrew the bell and it comes apart

My Herse stem has a 6mm hole so the bell's 5mm threaded post has to go

Ready to drill and thread the bell's aluminum post

Slow and easy; it's soft aluminum

The 6mm threaded post to receive the bell with a drop of thread adhesive

The finished bell!

Rider's view (the striker can be placed wherever you want it)
There you have it, a pretty easy method of making a reasonable replacement bell for a René Herse. And, if I ever find a correct, original bell for the bike (please let me know if you have one), I will be able to simply remove this new one and install it.

In the meantime, this nice little Crane bell will do. And don't worry, the modern handlebar tape will be replaced with cloth, and I have nice new-old-stock brake hoods ready to slip on, courtesy of Cycles de ORO.

Good luck with your bicycle projects,
Jim

Sunday, February 24, 2013

Karl Edwards' Beautiful New Albion Head Badge

My friend, cyclist and artist, Karl Edwards just completed a head badge for New Albion Cycles - and being a longtime lover and collector of bicycle badges (also called nameplates), I just had to share it with you. Here's a photo. Be sure to read Karl's fascinating backstory on how he designed it on his blog.

The scene depicts Sir Francis Drake in his ship The Golden Hind sailing in San Francisco Bay in 1579. I had no idea.

Someone pointed out that there aren't any holes in the badge yet. I haven't asked Karl to find out the reason, however it could be that the badge is designed for attachment with an adhesive, like double-sided tape rather than the traditional rivets or tiny screws (that way it could go on carbon frames even). In any case, I can't wait to get one to add to my collection because it's a beaut.

If you search this blog for "head badges" you'll find more vintage bicycle badges, including this sweet selection from Schwinn.

Happy collecting!
Jim


Thursday, February 21, 2013

BIKE MOVIE: Dirt Jumping - Aptos, California

Here's one of the best little documentaries I've seen about the Post Office dirt jumps across town from me in Aptos, California and what an amazing influence on riding and riders it's been.


Link: https://www.youtube.com/watch?v=vH2vAfdNWy0