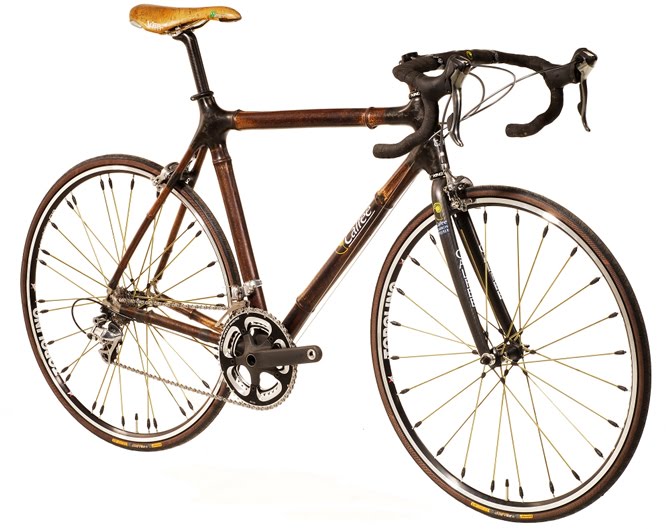
Hope you're enjoying some wonderful summer cycling. Here are a few recent conversations of interest.
Q: Greetings Jim,
I’ve got this problem with a water bottle cage screw that won’t unscrew itself, because the insert that goes in my Giant aluminum frame wall (the down tube to be exact) has come loose so both the screw and the insert are turning. I tried in vain with a long-nose pliers to hold the insert's ridge or ring preventing it turning, and with an Allen wrench to unscrew the screw, but the insert ridge is so thin that the long nose pliers keep slipping.
I just can’t get a good grip on it. So I’m thinking of sawing off the head of the screw, and by applying maximum pressure downwards with a screwdriver or a pointier tool on the ridge of the insert holding it down, I’ll be able to unscrew the screw. What do you think?
Thanks in advance,
Simon
A: Hi Simon,
What I would try is wedging something between the rivnut (the insert) and the frame to jam the insert in place. Most of them are just rivets, so to tighten them, you squeeze them tight against the frame again. Since you can’t do that until the cage is removed, you can try putting a shim in there, which is essentially the same thing as tightening the insert.
Maybe make a little wedge-shaped shim and slide it under. Maybe make it with a V notch so as you tap it, it goes under both sides of the insert. If you can tap a shim like this under the insert, that should help hold it, but in order to get the screw out, you’ll need to hold it with a ViseGrip or some tool like that (locking pliers) so that you can pull up as you turn the screw (angling it sideways can help, too).
Another idea is to try heating the screw first and letting it cool. If you could get some heat to travel down the screw and perhaps expand the screw, when it cools, it won’t be gripping the insert so tightly. Don’t burn your paint, though.
Bike shops should have a tool for tightening the insert back in the frame – or removing yours and putting in a new one. But, you might need to go to a Giant dealer, since it’s a Giant frame. They might have a way to get the screw out too. You could call your local Giant dealer and ask.
Be sure to also check out Park Tool's webpage on dealing with loose bottle-cage rivnuts and getting screws out. It even has a cool tip for using a quick-release skewer and hub to make your own rivnut tightening tool!
Hope this helps you fix this problem,
Jim
------------------------------------------------------
Q: I stumbled across your www, Jim. I have a bike where the handlebars are above the saddle I purchased it to start exercising. I am 22 stone (308 pounds) and am finding it hard to get a comfortable saddle. I read your extensive articles about bicycle seats. What do you think would be a good one for me? I have a wide cushion at the moment.
Thanks
Steve
A: Hi Steve,
The best way to find a seat you like is to visit a bicycle shop that has a good selection and then actually sit on them on a bike to see how they feel. Most good shops will let you bring a seat back if it doesn’t work for you. So, you could try out what they recommend, and what feels good in the store, and then if it didn’t work, you’d be able to return it and try another one.
When you ride in an upright position you typically need a wide seat since more of your weight is directly on it. It might be that the seat you have doesn’t fit you quite right since everyone’s body is a little different. That’s why it’s so important to try seats. If you brought your seat into the bike shop with you, you could compare it to the seats they offer and try something slightly different.
You can also think about what shape might feel better by thinking about what parts of the seat you have now bother you. You want the seat to support your sit bones and not interfere with your legs when pedaling. You also don’t want pressure on sensitive areas. Since seats all have different shapes it can take some experimentation to find the right one. But, if the bike shop has experience in seats, they should be able to see what you have now, listen to what’s bothering you about it, and then be able to suggest a replacement that will solve these problems.
I hope this is helpful and you find a nice, comfortable seat. There are a great many to choose from so keep trying,
Yours in cycling,
Jim
------------------------------------------------------
Q: Hi Jim,
Here is my situation. I live in Philadelphia and just met this really great guy about two weeks ago. He is a cycling enthusiast and works at a bike shop. It is his birthday in a few days and I thought a nice gift would be a copy of the August 1, 1983 issue of the New Yorker magazine (bike shop scene on cover) featured on your site. I have checked eBay and the internet with no luck. Any suggestions on how to get my hands on a copy of this? Or if not, any other suggestions for a 31 year old bike enthusiast on his birthday?
Thanks for any suggestions!
Olivia
A: That’s one of the most popular covers in my collection, Olivia, and one of my favorites, too. It’s what started me on collecting The New Yorker covers in the first place, and I'm sure your cyclists friend will love it as a gift.
To get a copy, the first option is to simply print that cover from my site. I've gotten feedback from people who've done this with good printers and they say it looks great in a frame over their desk.
The next option would be to visit the New Yorker site and print it from there, where it's even larger. You can also purchase a reprint of the cover. Visit this website and you should be able to find it and purchase it.
Best birthday wishes to your friend. Hope he loves the cover.
Jim
------------------------------------------------------
This blog complements Jim Langley's bicycle website. As a longtime bicycle mechanic, cycling author and former Bicycling Magazine tech editor, I get bike baskets full of email. And, whether I'm providing repair help, classic bike info, buying tips, or sharing my bike news & views, you can follow along right here to join the fun. Good reading & riding! — Jim (Email me at jim@jimlangley.net)
Sunday, July 18, 2010
Sunday, July 4, 2010
Q&A: Broken-Spoke Fix, MTB to Road Rings, Cleats & Slipping Gears
Happy Tour de France season everyone. Hope your cycling summer is in full spin. Here are some recent technical questions and answers I think you'll like.
Q: Hi Jim,
I have a pair of Rolf Prima Elan Aero wheels and am about to change a dinged spoke. I am a competent mechanic and have successfully built standard wheels before but have never delved into the ultralight, high-tension, paired-spoke designs. I am looking for any guidance you might offer, but my specific concern is the effect of removing the single spoke without detensioning the whole wheel (something I don't really want to do). The spoke in question is just slightly dinged (and I don't trust it to ride on) but the wheel is completely true. Do you see a problem with just swapping out the spoke?
Thanks for any help... keep up the great work,
Tracey
A: Great question, Tracey,
On the spoke - if it just has a tiny nick, it’ll probably hang in there indefinitely. I’m riding on 8 spokes like that right now and just haven’t got around to fixing them. A stick jammed in my rear derailleur and that brought it into the wheel, munching the spokes.
Mine are DT Swiss spokes, which are very strong so I’m betting they won’t break even though they’re all gouged pretty good – but I do have 32 spokes in this wheel, which is a lot and that helps.
So, to be 100% safe, you would replace your spoke. As long as you don’t cut the bad spoke out you shouldn’t do any damage to the wheel removing it. Just unscrew the nipple slowly and surely and remove the bad spoke. Then, install the new one. Be sure to lubricate inside the nipple and the outside of the nipple so it turns nicely on the spoke threads and on the rim, too. Also, press the hub end of the spoke down so it seats on the hub in case there’s any extra bend.
Next just gradually bring that spoke back to tension. Do this by ear. Pluck the spokes on the same side and listen to their pitch. Then tighten that new spoke until it makes the same pitch when plucked. In most cases, when the pitch is the same, the wheel will be nice and true as before. You probably won’t have to do any final truing - or just a tiny bit.
If you are really worried about stressing the rim removing one spoke, you could do this (photo): put the wheel back in the frame and turn it so that the bad spoke is right next to the seatstay. Then, wrap a toe strap (or tie) around the rim and stay on the same side as the bad spoke, and snug the toe strap. The toe strap will keep the rim from moving when you remove the spoke.
This will prevent any possibility of damage to the wheel at all and make it even easier to install and retension the new spoke,
Truely yours,
Jim
-------------------------------------------------------
Q: Hey Jim, I have a Trek mountain bike. I have slick road tires on it because I do road riding; no trails. I can get up to 20 mph at around 90 revs per minute. I would like to go from the 3 stock chainrings to two road-bike chainrings. What 3 chainrings - not brand, but how many teeth on the small one and how many teeth on the large one should I use? I live in Jacksonvile, Florida: Flatsville.
Thanks for your help!
Lee
A: This is a little tricky to answer because I’m not sure what model front derailleur you have on your bicycle or what chainring sizes you have now or what chain length you have, either. You might be able to just change the 2 larger chainrings on your bike to larger ones and simply raise your front derailleur higher on the frame to get it to clear the new, larger rings. But, usually if you go to significantly larger chainrings, you will need to add links to the chain too.
For example, a common mountain-bike triple-chainring combination is 22/32/44. Standards for the road are 39/53 and 34/50 (called "compact" chainrings). First you need to see if you can find road chainrings that will fit your MTB crankset (bolt patterns differ). And, then you need to make sure that you can raise your front derailleur enough to not bump into the largest chainring. Sometimes they can be raised easily and sometimes they can't.
Another option would be to change to a true road double crankset. For this, you would probably need to install a new road bottom bracket to go with it. That’s the bearing assembly in the frame that the crankset attaches to. That’s usually required because the double crankset sits closer to the frame than the triple.
You’ll also need a new front derailleur that works with the road double crankset since you have a derailleur made for triple cranksets now. And, you might need a new left/front shift lever to get the shifting to work right.
So, the easiest thing to get higher gearing will probably be to figure out what the largest chainrings you can put on your bike are that won’t require a new front derailleur. You will still have 3 chainrings, but 2 will be bigger and give you the higher/faster gearing you want. A good bike shop should be able to look at your bike and help you find the right rings so that this upgrade doesn’t cost you too much.
Another way of looking at this is that if you mainly ride on the road and don’t plan to ride off road, instead of making any more changes (spending any more money) to your mountain bike, you could reinstall the stock knobby tires and sell it as a nice, used mountain bike. Then you could take that money and purchase a nice road bike that was ready to go for real road riding.
That makes sense because no matter how many changes you make to your mountain bike, it will always be designed mainly for off-road use. Lots of people turn mountain bikes into pseudo road bikes, but, while they work fine, they won’t match the performance of a true road bike. So,if you really want to ride the road a road bike makes the most sense in most cases.
Have fun dialing in your bike,
Jim
--------------------------------------------
Q: Hi Jim,
I am looking at replacing my worn out Diadora road cycling shoe with a pair of new Sidi’s. I have had the Diadoras for a while, having had them professionally fitted in a bike store using a bike-fit platform, where they marked the ball of my foot and corrected the orientation of the cleat to the shoe.
I was wondering if there was a way I can achieve the same result myself without having to consult the bike store again?
As a racing cyclist I have used the fit and adjust method over the years. That is, I have fitted the cleats where I think they should sit on the shoe, fixed them tight then ridden for a while, making slight adjustments each time. Obviously this method is far more time consuming than having them professionally fitted.
Appreciate your feedback.
Tony
A: Nice to hear from you, Tony, and sure, you can fit your cleats yourself to your new Sidi shoes. All the new space-age fitting methods are pretty cool and very helpful for people who need them, but people have been fitting cleats to bike shoes for a hundred years without them and doing just fine, so they’re not essential.
There are only 2 steps: 1) get them in the right position so the ball of your foot is over the pedal axle; and 2) make sure they are at the right angle so that the pedaling feels neutral (no pain or discomfort in your knee).
I have a cycling shoe cleat adjustment page on my website with more detailed step-by-step instructions you can follow here
Hope this helps and let me know if you have any questions!
Jim
----------------------------------------------------
Q: Hello, Jim. I really enjoy your website and have referred it to others like myself who are just getting into riding. I like to ride but can't get used to all the shifting so I always stand when climbing a steep grade. And all the slipping, etc. makes me uncomfortable. I'm 57 and too old to change my ways. There are bikes I've seen sold with rear hub gears. But with only 7 or 8 speeds that these drivetrains have, will I be able to adapt to the selected ratios given, compared to a 21- or 27-speed road bike? How much difference in the gearing is there?
Thanks!
Tracey
A: I’m not sure how to answer your question, Tracey, because you said you can’t get used to shifting your bike, but then you said it’s always slipping. A bicycle’s gears shouldn’t slip. That suggests that they’re not adjusted correctly. And, any gears, if they’re not adjusted correctly (even bikes with hub gears) will give you problems.
So, the correct solution is probably not to spend a bunch of money buying a new bike to get a different gearing system that can also slip, but to have your bicycle checked out to adjust it and stop it from slipping.
So, that’s one option. But, when you said “slipping” you might have meant that you just don’t like the way derailleur gears work. They work by moving the chain across the different gears. This can feel funny if you’re not used to it, or if you don’t know how to shift correctly. The key thing to remember is that you need to keep the pedals moving in order to shift, but you NEVER put any pressure on the pedals during the shifting. You aren’t pedaling to move the bike down the road. You’re just pedaling super easily to move the chain so it can climb onto the next gear. You wait for the chain to find the gear and seat on it, and then you can apply pressure to the pedals again.
If you try to shift when you’re halfway up a hill and you have pressure on the pedals to climb the hill, the chain could slip or make noise. The key is to shift BEFORE that steep part so that you can take the pressure off during the shift, let the chain find the next gear and then you can apply pressure again.
The more modern the drivetrain the smoother the shifting. But, it has to be adjusted right too. Bikes sold by bicycle shops will be adjusted right. Bikes sold by department stores will not be adjusted right (they don’t employ bicycle mechanics).
If you don’t like the feel of a derailleur drivetrain, with the chain moving all the time, or don’t like having to shift right and left levers, a hub gearing system can be a nice alternative. These have been around forever and they work great. But you’re right that they generally provide fewer gears. Typically you have one lever on the right side and 3 to 8 gears available from the rear hub. You simply click the lever and with each click one way it gets easier to pedal, and harder with each click when you move the lever the other way.
Hub gearing typically comes on bicycles that weigh more than the same bike with derailleur gears and more weight means more effort to pedal the bike. So, it really depends on where and how you ride your bike in determining whether hub gears make sense or not.
They’re pretty ideal for shorter, flatter rides and utility cycling where you ride into town and back or around town. They’re not so good on hilly terrain or long rolling rides where you need to shift a lot and use a wider range of gearing. Note that hub gearing comes close to having the same low and high gear as a derailleur drivetrain but there are less choices in between that high and low since you only have 8 gears, or so.
If you told me how you plan to use this bike, I would be able to better answer if hub gears make sense for you. But, the other thing you could do is visit a bike shop with these bikes and take a test ride to see how you like it on one of your rides. I think you’ll really enjoy the shifting since it’s much simpler than derailleur shifting. I just don’t know if it will provide the gearing you need for the typical riding that you do.
My hub-gear bikes are my city bikes. I wouldn’t take them on a 30-mile hilly ride, but they’re great for getting around town, to the beach and all over the neighborhood.
To smooth shifting,
Jim
-----------------------------------------------------
Q: Hello Jim,
I've started commuting again on my bike after a layoff of a few years. So I'm doing my tune-up today in the sunshine. Your website is very helpful, I'm really learning a lot.
I have one problem. I cannot adjust my rear brake cable at all. I think this is because when I got the bike a decade ago, I had the drop handlebar fitted from my previous bike, with the safety levers (which I do like). But the rear brake caliper wasn't changed, so I have no adjuster on the lever and no adjuster on the caliper.
So how can I tighten the rear cable? Any suggestions? Strangely, there is an adjuster on the front cable, above the caliper, with a lever to loosen it.
Hope you can help,
Jon
A: Hi Jon,
Congrats on commuting by bicycle again. Good for you! Here are some tips on your brake:
If a brake has no adjuster, the way to adjust it is with the cable. So, what you do is keep trying different cable adjustments until you get the brake operating the way you like it. You do this by loosening the cable anchor bolt on the brake and pulling the cable through to remove slack, or letting a little cable slide through to create slack so you have more room between the brake pads and rim.
One adjustment trick that may help you is to make shims or spacers – 2 pieces of cardboard work nicely. Take these shims and put them beneath both brake pads. Now, hold the brake closed, pull on the cable to remove all slack and tighten the cable anchor bolt. Next remove your cardboard shims. That should give you a nicely adjusted brake where the pads clear the rim and still offer nice, powerful stopping power too.
Hope this gets those stoppers working great!
Jim Langley
Q: Hi Jim,
I have a pair of Rolf Prima Elan Aero wheels and am about to change a dinged spoke. I am a competent mechanic and have successfully built standard wheels before but have never delved into the ultralight, high-tension, paired-spoke designs. I am looking for any guidance you might offer, but my specific concern is the effect of removing the single spoke without detensioning the whole wheel (something I don't really want to do). The spoke in question is just slightly dinged (and I don't trust it to ride on) but the wheel is completely true. Do you see a problem with just swapping out the spoke?
Thanks for any help... keep up the great work,
Tracey
A: Great question, Tracey,
On the spoke - if it just has a tiny nick, it’ll probably hang in there indefinitely. I’m riding on 8 spokes like that right now and just haven’t got around to fixing them. A stick jammed in my rear derailleur and that brought it into the wheel, munching the spokes.
Mine are DT Swiss spokes, which are very strong so I’m betting they won’t break even though they’re all gouged pretty good – but I do have 32 spokes in this wheel, which is a lot and that helps.
So, to be 100% safe, you would replace your spoke. As long as you don’t cut the bad spoke out you shouldn’t do any damage to the wheel removing it. Just unscrew the nipple slowly and surely and remove the bad spoke. Then, install the new one. Be sure to lubricate inside the nipple and the outside of the nipple so it turns nicely on the spoke threads and on the rim, too. Also, press the hub end of the spoke down so it seats on the hub in case there’s any extra bend.
Next just gradually bring that spoke back to tension. Do this by ear. Pluck the spokes on the same side and listen to their pitch. Then tighten that new spoke until it makes the same pitch when plucked. In most cases, when the pitch is the same, the wheel will be nice and true as before. You probably won’t have to do any final truing - or just a tiny bit.
If you are really worried about stressing the rim removing one spoke, you could do this (photo): put the wheel back in the frame and turn it so that the bad spoke is right next to the seatstay. Then, wrap a toe strap (or tie) around the rim and stay on the same side as the bad spoke, and snug the toe strap. The toe strap will keep the rim from moving when you remove the spoke.
This will prevent any possibility of damage to the wheel at all and make it even easier to install and retension the new spoke,
Truely yours,
Jim
-------------------------------------------------------
Q: Hey Jim, I have a Trek mountain bike. I have slick road tires on it because I do road riding; no trails. I can get up to 20 mph at around 90 revs per minute. I would like to go from the 3 stock chainrings to two road-bike chainrings. What 3 chainrings - not brand, but how many teeth on the small one and how many teeth on the large one should I use? I live in Jacksonvile, Florida: Flatsville.
Thanks for your help!
Lee
A: This is a little tricky to answer because I’m not sure what model front derailleur you have on your bicycle or what chainring sizes you have now or what chain length you have, either. You might be able to just change the 2 larger chainrings on your bike to larger ones and simply raise your front derailleur higher on the frame to get it to clear the new, larger rings. But, usually if you go to significantly larger chainrings, you will need to add links to the chain too.
For example, a common mountain-bike triple-chainring combination is 22/32/44. Standards for the road are 39/53 and 34/50 (called "compact" chainrings). First you need to see if you can find road chainrings that will fit your MTB crankset (bolt patterns differ). And, then you need to make sure that you can raise your front derailleur enough to not bump into the largest chainring. Sometimes they can be raised easily and sometimes they can't.
Another option would be to change to a true road double crankset. For this, you would probably need to install a new road bottom bracket to go with it. That’s the bearing assembly in the frame that the crankset attaches to. That’s usually required because the double crankset sits closer to the frame than the triple.
You’ll also need a new front derailleur that works with the road double crankset since you have a derailleur made for triple cranksets now. And, you might need a new left/front shift lever to get the shifting to work right.
So, the easiest thing to get higher gearing will probably be to figure out what the largest chainrings you can put on your bike are that won’t require a new front derailleur. You will still have 3 chainrings, but 2 will be bigger and give you the higher/faster gearing you want. A good bike shop should be able to look at your bike and help you find the right rings so that this upgrade doesn’t cost you too much.
Another way of looking at this is that if you mainly ride on the road and don’t plan to ride off road, instead of making any more changes (spending any more money) to your mountain bike, you could reinstall the stock knobby tires and sell it as a nice, used mountain bike. Then you could take that money and purchase a nice road bike that was ready to go for real road riding.
That makes sense because no matter how many changes you make to your mountain bike, it will always be designed mainly for off-road use. Lots of people turn mountain bikes into pseudo road bikes, but, while they work fine, they won’t match the performance of a true road bike. So,if you really want to ride the road a road bike makes the most sense in most cases.
Have fun dialing in your bike,
Jim
--------------------------------------------
Q: Hi Jim,
I am looking at replacing my worn out Diadora road cycling shoe with a pair of new Sidi’s. I have had the Diadoras for a while, having had them professionally fitted in a bike store using a bike-fit platform, where they marked the ball of my foot and corrected the orientation of the cleat to the shoe.
I was wondering if there was a way I can achieve the same result myself without having to consult the bike store again?
As a racing cyclist I have used the fit and adjust method over the years. That is, I have fitted the cleats where I think they should sit on the shoe, fixed them tight then ridden for a while, making slight adjustments each time. Obviously this method is far more time consuming than having them professionally fitted.
Appreciate your feedback.
Tony
A: Nice to hear from you, Tony, and sure, you can fit your cleats yourself to your new Sidi shoes. All the new space-age fitting methods are pretty cool and very helpful for people who need them, but people have been fitting cleats to bike shoes for a hundred years without them and doing just fine, so they’re not essential.
There are only 2 steps: 1) get them in the right position so the ball of your foot is over the pedal axle; and 2) make sure they are at the right angle so that the pedaling feels neutral (no pain or discomfort in your knee).
I have a cycling shoe cleat adjustment page on my website with more detailed step-by-step instructions you can follow here
Hope this helps and let me know if you have any questions!
Jim
----------------------------------------------------
Q: Hello, Jim. I really enjoy your website and have referred it to others like myself who are just getting into riding. I like to ride but can't get used to all the shifting so I always stand when climbing a steep grade. And all the slipping, etc. makes me uncomfortable. I'm 57 and too old to change my ways. There are bikes I've seen sold with rear hub gears. But with only 7 or 8 speeds that these drivetrains have, will I be able to adapt to the selected ratios given, compared to a 21- or 27-speed road bike? How much difference in the gearing is there?
Thanks!
Tracey
A: I’m not sure how to answer your question, Tracey, because you said you can’t get used to shifting your bike, but then you said it’s always slipping. A bicycle’s gears shouldn’t slip. That suggests that they’re not adjusted correctly. And, any gears, if they’re not adjusted correctly (even bikes with hub gears) will give you problems.
So, the correct solution is probably not to spend a bunch of money buying a new bike to get a different gearing system that can also slip, but to have your bicycle checked out to adjust it and stop it from slipping.
So, that’s one option. But, when you said “slipping” you might have meant that you just don’t like the way derailleur gears work. They work by moving the chain across the different gears. This can feel funny if you’re not used to it, or if you don’t know how to shift correctly. The key thing to remember is that you need to keep the pedals moving in order to shift, but you NEVER put any pressure on the pedals during the shifting. You aren’t pedaling to move the bike down the road. You’re just pedaling super easily to move the chain so it can climb onto the next gear. You wait for the chain to find the gear and seat on it, and then you can apply pressure to the pedals again.
If you try to shift when you’re halfway up a hill and you have pressure on the pedals to climb the hill, the chain could slip or make noise. The key is to shift BEFORE that steep part so that you can take the pressure off during the shift, let the chain find the next gear and then you can apply pressure again.
The more modern the drivetrain the smoother the shifting. But, it has to be adjusted right too. Bikes sold by bicycle shops will be adjusted right. Bikes sold by department stores will not be adjusted right (they don’t employ bicycle mechanics).
If you don’t like the feel of a derailleur drivetrain, with the chain moving all the time, or don’t like having to shift right and left levers, a hub gearing system can be a nice alternative. These have been around forever and they work great. But you’re right that they generally provide fewer gears. Typically you have one lever on the right side and 3 to 8 gears available from the rear hub. You simply click the lever and with each click one way it gets easier to pedal, and harder with each click when you move the lever the other way.
Hub gearing typically comes on bicycles that weigh more than the same bike with derailleur gears and more weight means more effort to pedal the bike. So, it really depends on where and how you ride your bike in determining whether hub gears make sense or not.
They’re pretty ideal for shorter, flatter rides and utility cycling where you ride into town and back or around town. They’re not so good on hilly terrain or long rolling rides where you need to shift a lot and use a wider range of gearing. Note that hub gearing comes close to having the same low and high gear as a derailleur drivetrain but there are less choices in between that high and low since you only have 8 gears, or so.
If you told me how you plan to use this bike, I would be able to better answer if hub gears make sense for you. But, the other thing you could do is visit a bike shop with these bikes and take a test ride to see how you like it on one of your rides. I think you’ll really enjoy the shifting since it’s much simpler than derailleur shifting. I just don’t know if it will provide the gearing you need for the typical riding that you do.
My hub-gear bikes are my city bikes. I wouldn’t take them on a 30-mile hilly ride, but they’re great for getting around town, to the beach and all over the neighborhood.
To smooth shifting,
Jim
-----------------------------------------------------
Q: Hello Jim,
I've started commuting again on my bike after a layoff of a few years. So I'm doing my tune-up today in the sunshine. Your website is very helpful, I'm really learning a lot.
I have one problem. I cannot adjust my rear brake cable at all. I think this is because when I got the bike a decade ago, I had the drop handlebar fitted from my previous bike, with the safety levers (which I do like). But the rear brake caliper wasn't changed, so I have no adjuster on the lever and no adjuster on the caliper.
So how can I tighten the rear cable? Any suggestions? Strangely, there is an adjuster on the front cable, above the caliper, with a lever to loosen it.
Hope you can help,
Jon
A: Hi Jon,
Congrats on commuting by bicycle again. Good for you! Here are some tips on your brake:
If a brake has no adjuster, the way to adjust it is with the cable. So, what you do is keep trying different cable adjustments until you get the brake operating the way you like it. You do this by loosening the cable anchor bolt on the brake and pulling the cable through to remove slack, or letting a little cable slide through to create slack so you have more room between the brake pads and rim.
One adjustment trick that may help you is to make shims or spacers – 2 pieces of cardboard work nicely. Take these shims and put them beneath both brake pads. Now, hold the brake closed, pull on the cable to remove all slack and tighten the cable anchor bolt. Next remove your cardboard shims. That should give you a nicely adjusted brake where the pads clear the rim and still offer nice, powerful stopping power too.
Hope this gets those stoppers working great!
Jim Langley
Friday, June 4, 2010
FUN VIDEO: The Farren Collection
My friends Lawrie & Natalie Cranley of Bike Style Tours were kind enough to send me this Melbourne Cyclist video of Australian bicycle historians, collectors and curators, Paul & Charlie Farren showing some of their magnificent antique two-wheelers. I especially love the amazing Rudge Rotary Tricycle that Charlie demonstrates and Paul's ride on a Kangaroo. In case you can't see the video below, visit this link, where you can view it and learn more about the Farren's and their impressive collection.
Find more videos like this on Melbourne Cyclist
Wednesday, June 2, 2010
Q&A: Broken frame: seatpost binder; best tire pressure; Auto Bike derailleur
Here are three interesting bicycle technical questions that arrived to kick-off June:
Q: Hi Jim,
I've long followed your work on RBR and on your website and really appreciate both (although I'll confess that the whirring freewheel on your website makes me reach for the volume knob!).
I have an unusual problem that perhaps you can give some advice on.
The bike is an aluminum frame Danish "city" bike, V-brakes, Shimano Nexus hub, etc. The problem is that the top of the frame's seat tube has broken and will no longer hold the seatpost in position (the design is not a separate seatpost clamp, rather the older style bolt through the "ears" at the top of the frame). We've considered and discarded the following ideas:
1. Weld the ears back onto the frame. As mentioned, it is aluminum and we don't have the technology for that.
2. File off the ears and get the biggest available seatpost clamp to fit over the top of the tube. A no-go since there isn't enough metal and seatpost clamps are not big enough to make this work.
3. Pour some corrosion-inducing agent into the seatpost to lock it in place. Unfortunately the seatpost could never be moved again...
4. Drill a hole through the seat tube and seatpost and insert a bolt. This one just seems like a bad idea.
My latest idea is to buy or fabricate a new seatpost that acts as an expanding wedge such as older handlebar stems. I can only find very short expanding wedge seatposts for BMX bikes on the Internet. Do you have any experience with such a thing?
Thanks!
Tim
A: Thanks for the kind words about my site, Tim, and sorry about my freewheel noise – there’s a long story behind that but I’ll spare you.
Without seeing it, it’s hard to know if this would work, but it’s pretty easy to work with steel. So you might be able to get a flat piece of steel, maybe an inch wide, about 1/8 inch thick. Home Depot has stuff like this and Ace Hardware, etc. You might find a piece almost anywhere too, some recycled metal or trash.
Next, you would make a cardboard or paper template, wrapping paper around your seat tube and shaping it into a ring with an open end with tabs jutting out 90-degrees on either end.
You would then lay your template on the steel and trace the shape. Drill holes in the ends (that will be the tabs that your new seat bolt goes through). Then you would cut the shape out of the steel with a hacksaw and file.
Then you’d shape the steel, probably bending the tabs in the ends first since that will be easy and then shaping the steel into a ring. For that you might use your frame as a bending jig, or your seatpost.
If you get good steel, this should work, as long as there’s enough room on the frame to fit it on there. If the tabs bend when you tighten the bolt, you could try better steel, or try heat treating your clamp by heating it cherry red with a propane torch and then dropping it into water to quench and harden it.
If the seatpost is a good fit, it shouldn’t take too much to tighten it. You can paint your seat collar to prevent rust and look good.
Your idea of a wedge type seatpost is a good fix too. Those are available but hard to find. I recently saw that the Swiss company BMC uses one in their Team road bike (photo), but it’s carbon and expensive. The way they made theirs was clever though and the concept might work great for you.
They have a rubber piece at the bottom. When you tighten the bolt at the top, it pulls up and mushrooms the rubber piece and that locks the seatpost in the frame. That might be an easy way to make something like this for you.
You just need a polyurethane donut the same diameter of your seatpost (or maybe just plain old rubber will work). Then you need any threaded rod that passes through the seatpost and through the elastomers/polyurethane donut. Put a washer and nut on the top and bottom. Locktite the bottom nut or crush the threads so it can’t vibrate off. You would only need to tighten the top nut to compress the elastomers and lock your seatpost in the frame.
After writing this, I think the elastomers idea would be easier to try than making your own seat collar, so maybe you should start with that.
I hope this helps you fix the seatpost. Let me know how it goes,
Jim
-----------------------------------
Q: Jim, could you please settle the debate about tire pressure? I found only a little better ride at 83 psi, but less rolling resistance at 106. I run 700 x 28c Continental Gatorskin tires and my weight is 220 pounds. Is there a more ideal way to make a test run other than to try to just make the route the same at both psi and check the effort? I don’t have a watt meter. I normally run at 100 and am very happy to be getting about 2,200 miles on the tires but like everyone else looking to be better. What do you recommend?
Pam
A: Hi Pam,
I’m 160 pounds and when I ride on 28c tires, I run 90 psi front, 95 psi rear, and I do fine on the awful roads around here. On my standard Continental Grand Prix 4000 training tires, which are 25c, I ride 95 psi front, 100 psi rear since there’s less air in the tire.
Since you have 60 pounds on me, you need to ride at significantly higher pressures. Tire pressure and how it works for you is all about how much weight is on the tires and how much air is in the tires. Wider tires hold more air and more air supports more weight better.
So, I would recommend trying even more pressure, say 110 pounds in the front and 115 in the rear. This should feel better than 106 psi and provide an efficient ride. If you don’t feel a difference, bump it up slightly more to 115 front/120 rear. I can’t remember what the label on your tire says for max inflation, but my best guess is that it’s around 125 psi to 140 psi. At 220 pounds you should be toward the high end of the scale or else your tires will mushroom too much and add drag and not offer enough cushioning/support/grip.
Here’s a Bicycle Quarterly article (great magazine, by the way) with a more technical explanation and a way to actually measure your tires to determine the best pressure for your weight. This is based on research done by engineer Frank Berto who used to work at Bicycling Magazine with me. He’s a smart guy and author of the book The Dancing Chain. That's a history of bicycle derailleurs, which is a nice segue to the next Q & A...
Hope this helps you enjoy your tires more,
Jim
-----------------------------------
Q: Greetings Jim,
I have a Auto Bike. You know, the one that shifts on its own, which is why it's called the "Auto" Bike. The rear derailleur shifts into the different gears according to the speed of the rear wheel. And it does it because it's a special rear derailleur that reacts to weights spinning on the rear wheel.
The trouble is that my Auto Bike is used and I got it without that special rear derailleur - unfortunately. Do you know where I can find one? I've asked the local bike shop but they don't even want to bother with it. I've looked online but can't seem to find anything, just discussions on how bad the bike is.
I like the bike (I like weird things) - even though it's only a one-speed right now. If I can get an Auto Bike derailleur and get the automatic shifting working again, I think it will be a good bike for my wife. Can you please help me find one?
Got my fingers crossed!
David
A: Thanks for the email, David. I don’t know if they will be able to provide the right derailleur to make your Auto Bike auto shift again, but why don’t you try contacting the company that appears to have taken over where Auto Bike left off. They're called LandRider. The bike is different but it does auto shift, so maybe, just maybe, their derailleur will work on your bike.
If they can’t help you, what I would try is to find one on eBay by searching on “Auto Bike” once a week for a while. You might find one if you’re lucky. You might also see an entire Auto Bike for sale and if it is not too expensive it might be worth it to buy the whole bike to get the derailleur as you’d also get all the other parts and would then have backups for everything.
Last, you could put a regular shifting system on that bike if you wanted, but then it wouldn’t auto shift so that may not be of interest to you. But, just in case, that’s an option.
Hope this helps – and I think the Auto Bike is kind of cool. You can’t argue with the ingenious way it shifts and it’s sure a no-brainer to ride it. I think some bike shops don’t like it because they know it was sold online for cheap and wasn't designed to be a quality bicycle that's easy to service. But, if it was me, I’d be happy to help you fix it because it’s really fun fixing unusual bicycles and a sign of a good mechanic who can fix things even if it’s not that familiar to him.
So, you might want to ask at some other shops. It isn’t out of the realm of possibility that some shop in your area has worked on Auto Bikes and might even have a used derailleur that they took off one that they could use to fix up your bike. You would have to get a little lucky, but I always saved everything in my shop and there are other shops that do this.
You could just get on the phone and keep calling shops. You might get lucky. You only have to find a shop that likes helping all cyclists and keeps a wide assortment of used/old parts.
Let me know how it goes and have fun with that Auto Bike,
Jim
----------------------------------
Q: Hi Jim,
I've long followed your work on RBR and on your website and really appreciate both (although I'll confess that the whirring freewheel on your website makes me reach for the volume knob!).
I have an unusual problem that perhaps you can give some advice on.
The bike is an aluminum frame Danish "city" bike, V-brakes, Shimano Nexus hub, etc. The problem is that the top of the frame's seat tube has broken and will no longer hold the seatpost in position (the design is not a separate seatpost clamp, rather the older style bolt through the "ears" at the top of the frame). We've considered and discarded the following ideas:
1. Weld the ears back onto the frame. As mentioned, it is aluminum and we don't have the technology for that.
2. File off the ears and get the biggest available seatpost clamp to fit over the top of the tube. A no-go since there isn't enough metal and seatpost clamps are not big enough to make this work.
3. Pour some corrosion-inducing agent into the seatpost to lock it in place. Unfortunately the seatpost could never be moved again...
4. Drill a hole through the seat tube and seatpost and insert a bolt. This one just seems like a bad idea.
My latest idea is to buy or fabricate a new seatpost that acts as an expanding wedge such as older handlebar stems. I can only find very short expanding wedge seatposts for BMX bikes on the Internet. Do you have any experience with such a thing?
Thanks!
Tim
A: Thanks for the kind words about my site, Tim, and sorry about my freewheel noise – there’s a long story behind that but I’ll spare you.
Without seeing it, it’s hard to know if this would work, but it’s pretty easy to work with steel. So you might be able to get a flat piece of steel, maybe an inch wide, about 1/8 inch thick. Home Depot has stuff like this and Ace Hardware, etc. You might find a piece almost anywhere too, some recycled metal or trash.
Next, you would make a cardboard or paper template, wrapping paper around your seat tube and shaping it into a ring with an open end with tabs jutting out 90-degrees on either end.
You would then lay your template on the steel and trace the shape. Drill holes in the ends (that will be the tabs that your new seat bolt goes through). Then you would cut the shape out of the steel with a hacksaw and file.
Then you’d shape the steel, probably bending the tabs in the ends first since that will be easy and then shaping the steel into a ring. For that you might use your frame as a bending jig, or your seatpost.
If you get good steel, this should work, as long as there’s enough room on the frame to fit it on there. If the tabs bend when you tighten the bolt, you could try better steel, or try heat treating your clamp by heating it cherry red with a propane torch and then dropping it into water to quench and harden it.
If the seatpost is a good fit, it shouldn’t take too much to tighten it. You can paint your seat collar to prevent rust and look good.
Your idea of a wedge type seatpost is a good fix too. Those are available but hard to find. I recently saw that the Swiss company BMC uses one in their Team road bike (photo), but it’s carbon and expensive. The way they made theirs was clever though and the concept might work great for you.
They have a rubber piece at the bottom. When you tighten the bolt at the top, it pulls up and mushrooms the rubber piece and that locks the seatpost in the frame. That might be an easy way to make something like this for you.
You just need a polyurethane donut the same diameter of your seatpost (or maybe just plain old rubber will work). Then you need any threaded rod that passes through the seatpost and through the elastomers/polyurethane donut. Put a washer and nut on the top and bottom. Locktite the bottom nut or crush the threads so it can’t vibrate off. You would only need to tighten the top nut to compress the elastomers and lock your seatpost in the frame.
After writing this, I think the elastomers idea would be easier to try than making your own seat collar, so maybe you should start with that.
I hope this helps you fix the seatpost. Let me know how it goes,
Jim
-----------------------------------
Q: Jim, could you please settle the debate about tire pressure? I found only a little better ride at 83 psi, but less rolling resistance at 106. I run 700 x 28c Continental Gatorskin tires and my weight is 220 pounds. Is there a more ideal way to make a test run other than to try to just make the route the same at both psi and check the effort? I don’t have a watt meter. I normally run at 100 and am very happy to be getting about 2,200 miles on the tires but like everyone else looking to be better. What do you recommend?
Pam
A: Hi Pam,
I’m 160 pounds and when I ride on 28c tires, I run 90 psi front, 95 psi rear, and I do fine on the awful roads around here. On my standard Continental Grand Prix 4000 training tires, which are 25c, I ride 95 psi front, 100 psi rear since there’s less air in the tire.
Since you have 60 pounds on me, you need to ride at significantly higher pressures. Tire pressure and how it works for you is all about how much weight is on the tires and how much air is in the tires. Wider tires hold more air and more air supports more weight better.
So, I would recommend trying even more pressure, say 110 pounds in the front and 115 in the rear. This should feel better than 106 psi and provide an efficient ride. If you don’t feel a difference, bump it up slightly more to 115 front/120 rear. I can’t remember what the label on your tire says for max inflation, but my best guess is that it’s around 125 psi to 140 psi. At 220 pounds you should be toward the high end of the scale or else your tires will mushroom too much and add drag and not offer enough cushioning/support/grip.
Here’s a Bicycle Quarterly article (great magazine, by the way) with a more technical explanation and a way to actually measure your tires to determine the best pressure for your weight. This is based on research done by engineer Frank Berto who used to work at Bicycling Magazine with me. He’s a smart guy and author of the book The Dancing Chain. That's a history of bicycle derailleurs, which is a nice segue to the next Q & A...
Hope this helps you enjoy your tires more,
Jim
-----------------------------------
Q: Greetings Jim,
I have a Auto Bike. You know, the one that shifts on its own, which is why it's called the "Auto" Bike. The rear derailleur shifts into the different gears according to the speed of the rear wheel. And it does it because it's a special rear derailleur that reacts to weights spinning on the rear wheel.
The trouble is that my Auto Bike is used and I got it without that special rear derailleur - unfortunately. Do you know where I can find one? I've asked the local bike shop but they don't even want to bother with it. I've looked online but can't seem to find anything, just discussions on how bad the bike is.
I like the bike (I like weird things) - even though it's only a one-speed right now. If I can get an Auto Bike derailleur and get the automatic shifting working again, I think it will be a good bike for my wife. Can you please help me find one?
Got my fingers crossed!
David
A: Thanks for the email, David. I don’t know if they will be able to provide the right derailleur to make your Auto Bike auto shift again, but why don’t you try contacting the company that appears to have taken over where Auto Bike left off. They're called LandRider. The bike is different but it does auto shift, so maybe, just maybe, their derailleur will work on your bike.
If they can’t help you, what I would try is to find one on eBay by searching on “Auto Bike” once a week for a while. You might find one if you’re lucky. You might also see an entire Auto Bike for sale and if it is not too expensive it might be worth it to buy the whole bike to get the derailleur as you’d also get all the other parts and would then have backups for everything.
Last, you could put a regular shifting system on that bike if you wanted, but then it wouldn’t auto shift so that may not be of interest to you. But, just in case, that’s an option.
Hope this helps – and I think the Auto Bike is kind of cool. You can’t argue with the ingenious way it shifts and it’s sure a no-brainer to ride it. I think some bike shops don’t like it because they know it was sold online for cheap and wasn't designed to be a quality bicycle that's easy to service. But, if it was me, I’d be happy to help you fix it because it’s really fun fixing unusual bicycles and a sign of a good mechanic who can fix things even if it’s not that familiar to him.
So, you might want to ask at some other shops. It isn’t out of the realm of possibility that some shop in your area has worked on Auto Bikes and might even have a used derailleur that they took off one that they could use to fix up your bike. You would have to get a little lucky, but I always saved everything in my shop and there are other shops that do this.
You could just get on the phone and keep calling shops. You might get lucky. You only have to find a shop that likes helping all cyclists and keeps a wide assortment of used/old parts.
Let me know how it goes and have fun with that Auto Bike,
Jim
----------------------------------
Sunday, May 23, 2010
CLASSICS: Robin Hood, the bicycle
Ridley Scott's new hit movie, Robin Hood, starring Russell Crowe makes me think of other Robin Hoods - The Adventures of Robin Hood TV series and the brilliant 1938 Michael Curtiz movie of the same name with Errol Flynn as Robin, that all we kids watched in the sixties.But, even more interesting, it makes me think of the "English racer" 3-speed Robin Hood bicycles made by Raleigh, that some of us were lucky enough to ride at the time.
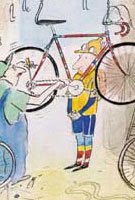
On the left is a 1944 Robin Hood bicycle ad from my collection. Click to enlarge it so you can see Robin in his boots and cap, and shouldering his bow and quiver). You can also make out that the 1944 Robin Hood model was likely higher quality and built with different components than the later models imported to the USA that we rode.
What's interesting to me, is that one 1960's 3-speed was pretty much identical to the next - sturdy all-British-steel construction, Sturmey-Archer 3-speed gearing, stamped-steel sidepull brakes, 26 x 1/38-inch wheels and tires, fenders and a chainguard.But by naming theirs after the famous bowman from Sherwood Forest, and affixing a wonderful head badge of Robin in his Lincoln green suit with Nottingham Castle in the background, and using Robin Hood-theme decals, Raleigh captured every boy's attention (surely lots of men's too), and made them think that riding a Robin Hood was a lot more fun than pedaling around on a no-name two-wheeler. And, I'm sure other boys, like we did, pretended their bikes were horses and they were Robin's band of merry men.
Robin Hood bicycles and head badges from the 1960's aren't all that hard to find or expensive. Check yard sales, flea markets, Goodwill stores, eBay, your neighbor's garage/attic!
If you get a good one in original condition, it'll be a nice rider perfect for getting around town or just becoming an outlaw and escaping reality for awhile.
Friday, May 14, 2010
New Cycling Book: The Lost Cyclist

Just in time to race to the top of your summer bicycle reading list, noted cycling historian David Herlihy will soon publish his new work, The Lost Cyclist. While I haven't finished it yet, it's safe to say that if you enjoy a good mystery, the story of top highwheel racer and world traveler Frank Lenz, who disappeared while circling the globe on his bicycle in 1894, should captivate you.
Herlihy, who also wrote The Bicycle, A History, and who earlier almost singlehandedly showed that it was Pierre Lallement, not Ernest Michaux who first put pedals on a two-wheel device (creating the first real bicycle), has done extensive research and traveled as much as Lenz did to finally tell the tale of this daring American adventurer from Pittsburgh.
I had heard of Lenz and his disappearance but had no idea that another cyclist took it upon himself to travel around the world to try to find him. And then fought for justice in his name. I especially enjoy the photos Lenz took showing him on Lookout Rock in Tennessee, on a treacherous bridge in China and in front of the Taj Mahal. The Lost Cyclist should be in book stores around June 18. In the meantime you can learn more about the book and author here.
Saturday, May 1, 2010
Q&A: Carbon frame repair, learning bike mechanics, disc brakes
Happy Bike Month! Be sure to join the pedaling party and get a free breakfast at B2W stops on your way biking to the office on Bike To Work Day on May 21. Here are three fun recent Tech Q & A's from my inbox:
Q: Hi Jim,
I have a carbon bicycle and someone in a car just hit me from behind. Luckily I wasn't hurt much. Unluckily though, my frame was damaged. I don't know if it's broken completely but I see cracks in four different places. I would like to know how much it would be to repair it? If you can give a place where to repair it in Los Angeles that would be great because I don't want to ship it. My other question is will it ride the same and will it affect the frame?
Have my fingers crossed,
Jorge
A: Hi Jorge,
If you got hit from behind hard and see cracks, you are probably right that your frame is damaged, and it sounds serious to me. To be sure, why don't you give the carbon wizards over at Calfee Designs a call (they're located in La Selva Beach, only 10 miles from my house).
They should be happy to talk to you about it on the phone. While they're not in LA, they've been fixing carbon bikes since the material first appeared on frames, and they really know their stuff. If you don't want to ship your frame, you could drive the bike up here. It's about a 6-hour drive from LA and worth it to be able to talk to them and show them your bike in person.
I know several excellent racers who have had Calfee fix their carbon bikes and they all say that the bike rides and looks just as good after the repair. So if they can fix your bike - and I believe they can fix just about anything - I'm sure it'll be as good as new.
Jim
--------------------------------------------
Q: Jim,
I am a 51 year old woman who has always wanted to take an old bike frame and build it up into something rideable. Please could you tell me if there are any online courses one can do to learn this stuff or can you recommend books for this purpose? I look forward to hearing from you.
Kind regards
Natalie in South Africa
A: Nice to hear from you, Natalie. It’s not all that complicated to build up a bicycle from a frame. You only need an assortment of the right tools and the right parts. Probably the easiest way to do it and learn in the process would be to find a friendly and good local bicycle shop, tell them that you’re interested in doing this and see what they recommend. They might actually have a used or cheap new frame to get you started and they would certainly have, or be able to order all the parts you need. They would then be happy to help you build it, since you purchased the frame and parts from them.
Alternatively, you might call local bicycle shops and ask if they offer basic bicycle maintenance classes you could attend. If so, you could meet the instructor and tell her what you plan to do and see if it’s appropriate for the class. I had this exact thing happen at one of my classes and even though it was basic repairs only, I was happy to take the extra time to help the student build his dream bike.
If you can’t find a bike shop teaching bike maintenance you could try asking if they would teach a class if you rounded up some friends who would pay to take it. That’s a good way to convince them they need to do it and they should make some money selling books, tools and parts, too, so they just might do it if you ask nice.
You could also check at local colleges to see if any offer a community outreach or recreational class in bicycle mechanics. Lots of colleges do this and since it’s a recreational (not a credited course) it’s often open to the public for a fee. Sometimes a city will have a summer program class like this too. Here you would find out about this in the newspaper calendar.
And, yes, there are plenty of books out there on bicycle maintenance including some of mine that you would learn a lot from. But it’s the hands-on that teaches you. The book is best as a guide to follow. You can pick up bike repair books for next to nothing at used book stores since so many have been sold over the years. The best thing is to browse through a few and buy the ones that are easiest for you to read and understand, and that cover the bicycle type you plan to work on.
Hopefully you’ve already found all the pages I have on my website full of tips and advice on fixing bicycles too. There’s all kinds of helpful tips on my site and it’s all geared for anyone. You don’t have to be an expert. And, anyone can work on bikes. It’s all easy to learn and do by anyone with basic mechanical skills.
A great online video resource where you can pick up lots of helpful information fast is Bicycle Tutor. Be sure to visit their site and watch because they offer everything from beginning to advanced procedures.
I hope this gives you the confidence to get started. Feel free to ask me any questions and I’ll help you as quickly and thoroughly as I can.
Also, keep in mind that, like the foundation of a house – if it’s all rotten or sinking into the ground – you can’t build a good house on it. A bicycle frame is the same way. If it’s rusted, bent, damaged, dented, etc., you won’t want to build a bicycle with it. Another issue is compatibility. If it’s an old frame it could have unusual dimensions or threading which would result in difficulty finding parts that fit. And, lastly is quality. Even if the frame is in good shape and has current dimensions to accept modern parts, if it’s made of cheap, heavy materials, it will result in a bicycle that doesn’t ride very nicely.
So, before you start you might want to get a second opinion on the frames to make sure you are starting with something worth building on. Also, if you plan to ride the bicycle, you want to make sure that the frame is the right size for you too. Maybe you already did that, but that’s very important if you’re going to ride the bikes.
Have fun!
Jim
PS: I realize you're in South Africa, but it's possible there are actual bike repair schools/colleges there like we have here. Two pretty famous ones are Barnett Bicycle Institute and United Bicycle Institute. These are real mini colleges where you take a week's worth of classes to learn to be a bicycle mechanic and get hands-on experience working with experts. United even has a course called Introduction to Bicycle Maintenance for Women. The cost is currently $675.
--------------------------------------------
Q: Howdy Jim,
I'm planning to purchase a new mountain bike for commuting in wet weather only. My question regards the type of brakes a $400-500 "throwaway" bike offer. The traditional long-pad brakes work well when wet. Do the newer disk brakes offer the same stopping power?
I am a longtime roadie and only use a mountain bike for foul weather, equipped with fenders and slicks (of course).
What do you think?
David
A: Hi David,
Yes, the disc brakes work great, better than rim brakes in wet AND dry conditions, so don’t hesitate to get a bike with them. I’m assuming by throwaway bike, you mean a brand-name bike, but an inexpensive bike. Those will have quality discs even if they’re inexpensive ones. If you buy a bike from a department store, though, you could end up with bad discs. But, any bike shop mountain bike with disc brakes should stop better in all conditions than the same bike with rim brakes.
One thing you might want to do is visit a bike shop, tell them you’re shopping for a bike and see if you can test ride a few bikes. If you get to compare discs versus rim brakes I think you’ll see that they work better. Note that new bikes have new disc brakes and they work better as they get used. Rim brakes work fine from the beginning. But, discs have to be “burned in” a process of the brake pads heating and burning some of their material into the rotors (the metal discs on the wheels). Until this happens, the discs won’t perform as they are designed to. Some bike shops know this and take the time on each bike build to burn in the brakes. Other bike shops don’t know this and don’t do it. So, if you try a bike with disc brakes that doesn’t stop well, get up to a cruising speed and apply the brakes steadily until you come to a stop. Repeat this a few times and you should feel the brakes start to work the way they should.
Sorry for the long explanation, but disc brakes are still relatively new and there’s a learning curve to setting them up right. Once discs are burned in, I think you’ll be very impressed with their performance. Other benefits include no worrying about damaging the rims since the brakes aren’t dependent on the rims, longer lasting brake pads, less adjustment, and in the case of hydraulic brakes (significantly better than cable-operated disc brakes), no more cable issues.
Hope this helps and have fun picking out the perfect bike!
Jim
--------------------------------------------
Q: Hi Jim,I have a carbon bicycle and someone in a car just hit me from behind. Luckily I wasn't hurt much. Unluckily though, my frame was damaged. I don't know if it's broken completely but I see cracks in four different places. I would like to know how much it would be to repair it? If you can give a place where to repair it in Los Angeles that would be great because I don't want to ship it. My other question is will it ride the same and will it affect the frame?
Have my fingers crossed,
Jorge
A: Hi Jorge,
If you got hit from behind hard and see cracks, you are probably right that your frame is damaged, and it sounds serious to me. To be sure, why don't you give the carbon wizards over at Calfee Designs a call (they're located in La Selva Beach, only 10 miles from my house).
They should be happy to talk to you about it on the phone. While they're not in LA, they've been fixing carbon bikes since the material first appeared on frames, and they really know their stuff. If you don't want to ship your frame, you could drive the bike up here. It's about a 6-hour drive from LA and worth it to be able to talk to them and show them your bike in person.
I know several excellent racers who have had Calfee fix their carbon bikes and they all say that the bike rides and looks just as good after the repair. So if they can fix your bike - and I believe they can fix just about anything - I'm sure it'll be as good as new.
Jim
--------------------------------------------
Q: Jim,
I am a 51 year old woman who has always wanted to take an old bike frame and build it up into something rideable. Please could you tell me if there are any online courses one can do to learn this stuff or can you recommend books for this purpose? I look forward to hearing from you.
Kind regards
Natalie in South Africa
A: Nice to hear from you, Natalie. It’s not all that complicated to build up a bicycle from a frame. You only need an assortment of the right tools and the right parts. Probably the easiest way to do it and learn in the process would be to find a friendly and good local bicycle shop, tell them that you’re interested in doing this and see what they recommend. They might actually have a used or cheap new frame to get you started and they would certainly have, or be able to order all the parts you need. They would then be happy to help you build it, since you purchased the frame and parts from them.
Alternatively, you might call local bicycle shops and ask if they offer basic bicycle maintenance classes you could attend. If so, you could meet the instructor and tell her what you plan to do and see if it’s appropriate for the class. I had this exact thing happen at one of my classes and even though it was basic repairs only, I was happy to take the extra time to help the student build his dream bike.
If you can’t find a bike shop teaching bike maintenance you could try asking if they would teach a class if you rounded up some friends who would pay to take it. That’s a good way to convince them they need to do it and they should make some money selling books, tools and parts, too, so they just might do it if you ask nice.
You could also check at local colleges to see if any offer a community outreach or recreational class in bicycle mechanics. Lots of colleges do this and since it’s a recreational (not a credited course) it’s often open to the public for a fee. Sometimes a city will have a summer program class like this too. Here you would find out about this in the newspaper calendar.
And, yes, there are plenty of books out there on bicycle maintenance including some of mine that you would learn a lot from. But it’s the hands-on that teaches you. The book is best as a guide to follow. You can pick up bike repair books for next to nothing at used book stores since so many have been sold over the years. The best thing is to browse through a few and buy the ones that are easiest for you to read and understand, and that cover the bicycle type you plan to work on.
Hopefully you’ve already found all the pages I have on my website full of tips and advice on fixing bicycles too. There’s all kinds of helpful tips on my site and it’s all geared for anyone. You don’t have to be an expert. And, anyone can work on bikes. It’s all easy to learn and do by anyone with basic mechanical skills.
A great online video resource where you can pick up lots of helpful information fast is Bicycle Tutor. Be sure to visit their site and watch because they offer everything from beginning to advanced procedures.
I hope this gives you the confidence to get started. Feel free to ask me any questions and I’ll help you as quickly and thoroughly as I can.
Also, keep in mind that, like the foundation of a house – if it’s all rotten or sinking into the ground – you can’t build a good house on it. A bicycle frame is the same way. If it’s rusted, bent, damaged, dented, etc., you won’t want to build a bicycle with it. Another issue is compatibility. If it’s an old frame it could have unusual dimensions or threading which would result in difficulty finding parts that fit. And, lastly is quality. Even if the frame is in good shape and has current dimensions to accept modern parts, if it’s made of cheap, heavy materials, it will result in a bicycle that doesn’t ride very nicely.
So, before you start you might want to get a second opinion on the frames to make sure you are starting with something worth building on. Also, if you plan to ride the bicycle, you want to make sure that the frame is the right size for you too. Maybe you already did that, but that’s very important if you’re going to ride the bikes.
Have fun!
Jim
PS: I realize you're in South Africa, but it's possible there are actual bike repair schools/colleges there like we have here. Two pretty famous ones are Barnett Bicycle Institute and United Bicycle Institute. These are real mini colleges where you take a week's worth of classes to learn to be a bicycle mechanic and get hands-on experience working with experts. United even has a course called Introduction to Bicycle Maintenance for Women. The cost is currently $675.
--------------------------------------------
Q: Howdy Jim,I'm planning to purchase a new mountain bike for commuting in wet weather only. My question regards the type of brakes a $400-500 "throwaway" bike offer. The traditional long-pad brakes work well when wet. Do the newer disk brakes offer the same stopping power?
I am a longtime roadie and only use a mountain bike for foul weather, equipped with fenders and slicks (of course).
What do you think?
David
A: Hi David,
Yes, the disc brakes work great, better than rim brakes in wet AND dry conditions, so don’t hesitate to get a bike with them. I’m assuming by throwaway bike, you mean a brand-name bike, but an inexpensive bike. Those will have quality discs even if they’re inexpensive ones. If you buy a bike from a department store, though, you could end up with bad discs. But, any bike shop mountain bike with disc brakes should stop better in all conditions than the same bike with rim brakes.
One thing you might want to do is visit a bike shop, tell them you’re shopping for a bike and see if you can test ride a few bikes. If you get to compare discs versus rim brakes I think you’ll see that they work better. Note that new bikes have new disc brakes and they work better as they get used. Rim brakes work fine from the beginning. But, discs have to be “burned in” a process of the brake pads heating and burning some of their material into the rotors (the metal discs on the wheels). Until this happens, the discs won’t perform as they are designed to. Some bike shops know this and take the time on each bike build to burn in the brakes. Other bike shops don’t know this and don’t do it. So, if you try a bike with disc brakes that doesn’t stop well, get up to a cruising speed and apply the brakes steadily until you come to a stop. Repeat this a few times and you should feel the brakes start to work the way they should.
Sorry for the long explanation, but disc brakes are still relatively new and there’s a learning curve to setting them up right. Once discs are burned in, I think you’ll be very impressed with their performance. Other benefits include no worrying about damaging the rims since the brakes aren’t dependent on the rims, longer lasting brake pads, less adjustment, and in the case of hydraulic brakes (significantly better than cable-operated disc brakes), no more cable issues.
Hope this helps and have fun picking out the perfect bike!
Jim
--------------------------------------------
Subscribe to:
Posts (Atom)