This blog complements Jim Langley's bicycle website. As a longtime bicycle mechanic, cycling author and former Bicycling Magazine tech editor, I get bike baskets full of email. And, whether I'm providing repair help, classic bike info, buying tips, or sharing my bike news & views, you can follow along right here to join the fun. Good reading & riding! — Jim (Email me at jim@jimlangley.net)
It's a new year and right off my friend Tim asked the great question, "How do I position the cleats on my new shoes, Jim?"
That subject is perfect for anyone just getting into cycling in 2022 or someone who has upgraded to clipless pedals or who just needs to install cleats on shoes, like Tim. To help, I wrote this article and made the video below in this blog post.
Clipless pedals - one of the most important cycling inventions
I can't help but reminisce when thinking about clipless pedals and setting cleats. Before clipless we used toe clips and straps. In case it's not obvious, the "clip" in "clipless" comes from toe clips.
Toe clips and straps worked but had issues. The straps could cut off the circulation to your feet. Your toes could hit the toe clips. The straps and clips would chafe and wear your cycling shoes. New riders could crash using toe clips and straps because to get out required a double motion involving lifting and pulling back the feet. When you were not riding in the toe clips and straps the pedals would hang upside-down and the toe clips and straps could rub and scrape on the pavement; or worse they might snag on something, even stopping the bike and causing a crash. This was more a problem off road than on.
All these issues had many cyclists including me! looking for alternatives. Cinelli had made their M 71 pedals in the 1970s introducing the concept of clipless. But while they were indeed clipless, they actually locked the feet on the pedals with removable pins. So most of us felt they were risky for use on the open road.
A company named AeroLite (still in business today) came out in the 1980s with a clipless pedal that solved the problem of locked-in feet. The AeroLite pedal was a round spindle. The cleat was a plastic piece with the perfect cutout to snap onto the round cylindrical pedals. To get in you stepped down and to exit, you rolled your ankle to the side which extracted the cleat from the pedals.
A couple of us at the Bicycle Center used these pedals for several years. They were superlight, gave ultra direct power transfer and we all loved them for riding. However, there was no float in the system at all so if you did not get the cleats attached in the perfect spot you could hurt your knees. The only other issue was if you tried riding on the pedals in sneakers like to make a coffee run at work, your feet would slip right off - pretty funny the first time it happened, but dangerous, too.
Hinault comes to San Francisco with the first Look clipless pedals
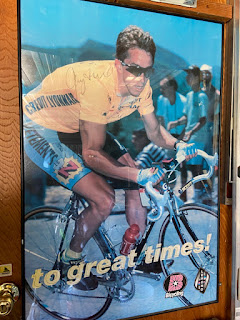
Then in 1985 the first two stages of the Coors Classic came to San Francisco along with 5-time Tour de France champion Bernard Hinault and teammate Greg LeMond who would go on to win 3 Tour de Frances. On the right is my signed poster from Greg.
Besides competing, Hinault was also there to introduce Look's new clipless pedals to bicycle dealers attending the race and the owner of the Bicycle Center, Roger Sands received a pair.
When Roger came back from the race he gave that first set of Look clipless pedals to me. I immediately put them on my bike.
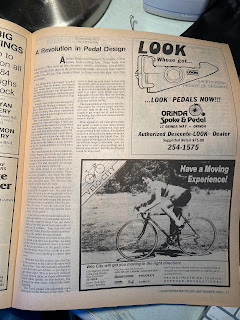
Right away I knew Look had developed the perfect clipless pedal. They were SO easy to get in and out off and boosted your pedal power like the AeroLites. I was so excited about them that for my Technicalities column in California Bicyclist magazine back then I wrote the first review of clipless pedals covering the AeroLites and the new Look pedals. That ran in the September, 1985 issue shown below.
Tolerance for bad knees
I wish I had waited to write that review because I had a chance to really test the new pedals in the 1985 World's Toughest Triathlon a little later. I was the biker on a coed relay team out of Santa Cruz sponsored by Reebok.
Amazingly, when our swimmer Judy Scovel came out of Lake Tahoe, she was just seconds behind the first place swimmer (sorry I forgot his name - I do remember he was an Olympian from a famous swimming family). And as Judy gave me the tag to get on my bike and take off, the other swimmer did the same to his biker, who was none other than Greg LeMond!
I remember thinking, 'wow, I'm actually racing Greg LeMond,' which was stupid because within 30 seconds he was out of sight.
It's impossible to find much about that race online but I am pretty sure Greg did the 120 mile extremely hilly bike leg in under 5 hours. I came in in about 7. We still got 3rd place thanks to Judy's great swim and Marty Kruger's epic marathon. The incredible Scott Molina won the race overall. He went by me on the bike like I was standing still. Which I almost was because the air was so thin on Monitor Pass that I literally could not breathe.
Back to the Look pedals, the thing that I noticed using them in that brutal triathlon bike leg was how they let you find and hold different foot angles to relieve any knee pain. It really was a game-changer because it meant that even if you didn't get your cleats perfectly aligned you could still ride comfortably on the pedals. I wish I had been able to explain that in my review. It was a great innovation and it wasn't too long before another French company, Time, introduced clipless pedals that had actual free float in them to protect the knees even more.
Still riding clipless and Look
Wrapping up, I've loved riding in Look pedals ever since those early days. I have tried lots of others from Campagnolo to Speedplay to a bunch of brands no longer around. But, I'm mostly on Look Keos now except for off road where I run Shimano SPD pedals and cleats. And I put clipless pedals right up there with the great cycling inventions for how they improved comfort and safety.
Thanks for reading and enjoy your bicycle in the new year!
Here on these pages, I've offered many common and not so common bike noises and how I and you have fixed them. To go back in time and see all the weird and wonderful noises and fixes for them, simply type in the search button the word "noise," and you'll find plenty to read and lots of ideas.
Recently, I've created two videos about noises. Since I have a library of bicycle wheel videos, I decided I needed a video all about common noises that come from bike wheels. Then, after I wrapped that up, I received a great comment reminding me of another very common noise-maker.
This one is a tick or click that only happens when you're pedaling. Most riders hear it and think - since it happens when you're pedaling - that it's coming from the drivetrain components. Which can lead to a lot of work trying to track the noise down in the pedals, cleats, crankarms, crankset, chainring bolts and bottom bracket.
And what can happen is that none of these things are the problem. Instead it's a dry seatpost binder bolt or clamp or the seat clamping hardware. It's about a 2 minute job to spray some lube on these areas. And often that little spritz will stop the tick or click.
Since it's so easy and such a time saver for fixing what is a highly frustrating noise, my second video is all about that and how to deal with it.
Here's the YouTube link to watch my Wheel Noises video:
https://youtu.be/sA62X1AXN7s
Here's the YouTube link to watch my Quick Fix for a Click or Tick when Pedaling:
https://youtu.be/ziQKB5bUIuk
Here are the videos (you won't see them in your email - you'll have to click the link to this blog to view them here - or click the links above to watch them on YouTube.
Thanks for reading and watching and here's to nice quiet rides!
If you're a YouTube fan, maybe you noticed that I'm trying my hand at filmmaking with some how-to's, product reviews, vintage bike features and favorite ride highlight amateur videos, plus some on subjects of interest outside of cycling. While I've been a cycling editor and journalist for most of my life, getting my John Ford on has been equal parts challenging and fun.
Well, the latest project, the one this post is about was way more challenging than fun. First, after many days of setups and filming (I do everything myself), my PC crashed and I had to start over.
Then, multiple times when I thought I was finished, I realized there was more needed in order not to leave rookie wheelsmiths guessing how to proceed - and this video of mine is specifically designed to help first-timers turn out a nice set of wheels - so I wanted it right.
But, challenging is the way it goes with explaining wheel building. There's a lot to it and it's easy to get confused. I believe from teaching it at bike shops and as a college instructor, and also from writing about it on my website and in Bicycling Magazine, that there's a way to make it easy for beginners.
That's what's in this hour-long step-by-step video. The full backstory is later in this post (along with a couple of cool wheel theme ads from my collection), but in case you just want to start watching the show - maybe you've got some rims and hubs you're ready to lace up! - then, here it is:
The backstory to my How To Build Bicycle Wheels the Easy Way
Bicycle wheels are amazing things. They've fascinated me since I first started working in bike shops. With just a handful of spokes, a hint of a hub and even the most humble hoop, the vast majority will easily take anything even the strongest pro can dish out and often outlast the components on the bike.
Incredibly tough
Once after a race, the team piled into my VW van and I drove smack over a wheel Rick had forgotten to put in the back with his Olmo. It lifted the van’s right rear wheel off the ground.
When we realized what had happened - and stopped laughing, we retrieved the wheel expecting to find a pretzel. We were all stunned (well, Rick was delighted), to see that the only damage was a bent quick release. The rim, spokes, hub and axle were unscathed and there wasn’t even the smallest wobble in the wheel.
Wonderfully resilient
And, bike wheels aren’t just strong, they’re resilient, too. Had Rick’s wheel been actually “pretzeled” - bike jargon meaning bent sort of in the shape of a potato chip (sometimes riders say “potato chipped” or “taco’d”) - I could probably have made it at least rideable again by simply standing on the wheel to push the largest wobbles back in place. Or with other forceful techniques (all hugely entertaining to execute and observe).
In the case of modern carbon rims, which don’t bend, I’ve had riders hit things so hard they cracked the carbon. But, the wheel didn’t even go out of true so they had no idea there was an issue and just kept riding. Only when they brought it in to me did we discover the hole in the carbon - sometimes thousands of miles later.
A yearn to learn
My interest in wheels at that first bike shop I mentioned, led me to start begging the more senior mechanics to teach me how to build wheels before I even knew how to fix flats properly. It doesn’t work that way, they told me. I had to master the basic stuff first.
I only worked at that shop the summer before I left for college. So, when I went to work in another shop near campus, I again immediately asked the head tech when he could teach me how to build wheels. And, again, I got the you’re-not-ready lecture.
I worked at that shop for several years and still couldn’t get anyone to teach me wheel building. So, fed up, I pulled a beat-up wheel out of the trash one Saturday at closing and took it home to figure it out myself on my day off.
That was 47 years ago. Ever since that home study I have been learning all I can about wheelsmithing, building wheels for customers and myself, and have remained passionate about it. I never kept track of all the wheels I built going back to the beginning. But, I can tell you that in the last four years, I have built 476 wheels in the wheel department at Praxis Works here in Santa Cruz. Talk about a dream job.
Others want to learn, too
Interestingly, it turns out that wanting to learn wheel building is not unique to me or green pro bike mechanics. I got asked so many times by customers in the shop to show them that I started teaching it with night classes in the store. It was great for rim, hub and spoke sales at the shop. And, I made a good chunk of change working after hours.
It’s super satisfying lacing up a set of wheels, getting them true and round and tight. Then the big fun is when they’re carrying you down the road at mach speed and you look down and admire your handiwork.
Plus you know that should they come out of true, you can fix them. And, anytime you want to build another pair or upgrade to a different rim or hubset, you can. Your new skills will make you the hero on group rides when you fix wheels for your buddies, too.
Paying it forward
While I don’t work retail anymore, I still get requests to teach people how to build wheels. Since 1999, I’ve had a couple of fairly long how-to’s on my personal bicycle website that show all the steps. I typically have pointed folks to these stories as a way to learn. They’re popular pages and I know they’ve helped lots of people build wheels.
But, wheel building is a detailed process and it’s easy to get lost in long mostly text documents. So, I decided some time ago to try to capture it on video - essentially everything I taught to my beginner students at the shop and class back when. I believe the way I teach it is a relatively easy method to learn to build wheels. Plus, because I actually show you with my hands and you can watch over my shoulder you will get it once you try it.
Today I’m happy to share with you the final video. It’s the result of over 60 hours of work and includes every tip and trick I know to make the job doable for anyone. It’s about an hour long so a lot to watch. But, as a YouTube video it’s watchable however and wherever you want (on a cellphone in your home bike shop, for example). And you can pause and rewind as needed.
If you’ve always wanted to learn to build bike wheels, I hope my video lets you do that. And, as I say on camera, I’m happy to help if you need it. Enjoy the show and please let me know how your wheels come out if you build a set!
The following is all true as far as I have been able to determine... Debuting in their 1967 Catalog #15, Campagnolo's Bicycle Assembling Stand held mythical status in the USA bike shops where I worked. A photo of it was right there in their catalogs, but no one had ever seen one or found one for sale. We mechanics assumed it was only available in Europe, or perhaps reserved for race mechanic use and not meant for everyday shop wrenches like us. We could buy copies from other companies, such as Cinelli, but even only from the catalog photo, it was obvious that Campy's was a precision, highest quality tool, just like the gorgeous presses, cutters and gauges in their full toolkit. I mentioned how hard the stands were to find while commenting online about one that turned up back east. And, because of that comment, I finally have a Campy stand (part #1102) in my collection. I'm so happy to have it that I'm telling you a little more about it and sharing some photos here. Czech Olympic Coach Jaromir Zak's stand
I purchased the stand from a man in Czechoslovakia, who read my comment online and knew I'd be interested. After agreeing on a price and paying him, I asked if he would be willing to tell me how he came to own it. He told me the following somewhat amazing story - this is as he wrote it in his email to me: "I
am glad you interest about story of this stand. I don't know where was this
stand purchased. I had it from my neighbor, Mr. Jaromir Zak. This man was the
coach of Anton Tkac, Olympic Winner 1976 Montreal and three times the World Champion in sprint. He was too Czechoslovakia state trainer of track
representation and at this times he has access to plenty of cycling material. I
am cycling enthusiast and I meet very oft this older man as he walking with his
dog.
Once, when I met him on my first self build fixie on old Favorit steel
frame, he told me he has maybe something for repairing and setting my bike. Hi
took me in his greenhouse and there was the stand. He told me, if I want I can
have if for my workshop. I took it (I didn't know how rare it is) and enjoyed
for repairs on my Favorit bike. One year ago I purchased for my fixie the State
Bicycle company frame, tubes of this frame are too thick for it and I haven't
use for the stand. I decided to offer it someone, who appreciate it. And the
next you know.
It is very likely on this stand were repaired and adjusted bikes
of Anton Tkac and other Czechoslovak cyclists in seventies. It
is all I know. This is maybe better story, than something about insignificant
workshop in my garage, isn't it?"
To learn more, all I had to do was search for Anton Tkac, which brought me to his racing accomplishments and also mention of his coach Jaromir Zak. Now, every time I look at or use the stand I imagine it in service trackside at the Olympics or World Championships. Incredible. Cleverly designed and built for hard use Campy designed the stand to come apart quickly into three pieces, the base, the upright and the tool tray. There are thumbscrews for speedy disassembly. Taken apart, the stand lays nearly flat to fit in a small travel case, or easily in the back of a vehicle.
The tripod base is stable and the bottom bracket support and down tube clamp hold a bike at exactly the right height for easy repairs. The bottom bracket support and clamp have leather attached to protect the frame when clamped. Besides using the stand for working on bicycles, it's an elegant and safe way to support a bike for display, too. It holds it where you can easily see the bike and walk around it. Plus, the stand itself is pleasing to the eye. I sometimes use it this way for my Masi. There are two swingout arms built in below the clamp that keep the front wheel from swinging side to side. The large tool tray can be positioned at just the right height to clear when you're pedaling for checking adjustments. At the bottom of the legs are little welded on feet to provide a little more grip. The entire stand is made of steel. As far as I can tell, everything is original - not repainted or repaired in any way. You can see from the chipped paint and corrosion that it was used a lot. I hope you enjoy the stand and history. I would appreciate learning more about Campagnolo's Bicycle Assembling Stand. Please get in touch if you have anything to share. In cycling, Jim
While not everyone needs a race mechanic's toolbox, I've gotten spoiled from using one as a pro mechanic at races and cycling events. I still find it important to have a full assortment of bicycle tools available when I go racing, and also when I'm on the road in our Lazy Daze RV - since our camping friends bring bikes that often need tuning and repair and I love to help.
I've been using an old Plano drawer-style plastic toolbox, which has worked fine for over 25 years. Recently, though, the handle broke. Then one of the latches failed. Inspecting the rest of the box I noticed that the plastic has become brittle and appears ready to crack in other places.
I started searching for a replacement and that's when I found that Park Tool just came out with a new mechanic's case that looks exceptional. It's called the BX-3 Rolling Big Blue Bicycle Mechanic's Tool Box . I liked it so much that I ordered one. Here are some observations and first impressions in my video below.
A brilliant redesign of the traditional bike race mechanic tool box
Park's BX-3 is significantly larger and has more features than I’ve ever seen in a pro-wrench box. NOTE that you only get the box - tools are sold separately. When I get this beauty all organized with my tools, I'll share how I set it up, so please watch for that.
The story behind the new design is that Park reached out to professional race mechanics to come up with a wishlist of features to design an all new pro-mech toolbox. I remember when I attended the debut USA Cycling Race Mechanic’s certification clinic in Colorado Springs in 1989. That clinic has taken place almost every year since.
And, who led a good part of the instruction back when I went and still today? None other than Park’s Calvin Jones, who probably had much to do with the making of this terrific new toolbox, drawing on the friendships he has going back decades with mechanics around the globe for ideas and inspiration.
Built-in wheels and pull handle plus much more capacity
Park’s due diligence shows in the details. This is the first travelling toolbox I’ve seen with built-in wheels and an extendable pull handle. No longer do mechanics have to lug heavy boxes around from shuttles to check-in or carry a separate folding rollercart to put their box on.
And, Big Blue really is big, allowing bringing along to races and events even larger tools, such as frame alignment, wheel and headset tools. There are workaround ways to perform almost every repair, however with full size tools you can work more quickly and usually more accurately, too.
To make repairs more efficient and save more time, the BX-3’s pallets boast 70% more surface area than those in its little brother the BX-2.2. This means having more tools within easy reach. While multiple pouches provide more room for bringing along additional small repair parts. There’s nothing better than having everything needed to do your best work.
Heavy-duty and built to take it
Besides holding your tools and providing easy access, a toolbox needs to withstand massive abuse, too. Even if a mechanic uses the box as carefully as possible, just the act of setting up “shop,” and removing, using and replacing tools, wears the box and tool holders. Park addresses this with rugged materials, quality stitching and connectors throughout and reliable closures.
A clever feature is rubber grommet-lined holes in the pallets. They’re for turning the pallets over to access tools on the other side. And when your hands are greasy, you only slime the easily cleaned rubber, not the pallets.
Turning to the case, it’s molded from thick, impact-resistant polypropylene with reinforcements all around. There are also four oversize spring-loaded latches, two stout carry handles and the beefy built-in wheels and extendable pull handle. To open the latches, you just pull out with your finger and they pop out and up releasing the lid. And, because they “hide” in-between the reinforcement ribs built into the box when they’re closed, they can’t be accidentally opened when the box is in transit.
Inside the box there are gas struts on either side to help open the top when weighed down by tools. A tray with slots for dividers reinforces the bottom. And, the toolbox is dust and water resistant thanks to its interlocking lid and rubber seal. There’s even an air pressure compensation valve for protection during air travel.
Professional box at a professional price
All this innovation and upgrading comes at the lofty price of $514.95 versus the BX-2.2 at $304.95 (which has also been updated for 2019). If you’re a home bike mechanic who doesn’t bring tools to bike events, you probably don’t need a box like this and you might find the price tag exorbitant.
But, hold on a minute. There are plenty of home mechanics who pay much more for professional quality rolling drawer-style toolboxes for their garages - think Snap-on. They don’t really need them, but they appreciate owning and using fine things.
I think some home bicycle mechanics are the same way and will appreciate having fine tool storage like this that actually can be be taken with you to important rides and races, too. There’s also a lot to be said for being able to hold all the bike tools you need in a toolbox that’s easy to store in the smallest apartment
And, for professional mechanics who rely on their tools, I bet Park’s Big Blue will become an overnight sensation.
Features
Heavy-duty impact-resistant polypropylene
Side and end foldaway carry handles
Extendable pull handle
Smooth rolling integrated wheels
Oversize spring-loaded latches, 2 front, 2 side
Dust and water resistant
Air pressure compensation valve
Custom designed tool-holding pallets with loops and pockets
Gas assisted lid struts for easy opening
Dual-sided upper and mid level folding pallet wings
Front tool pallet that stores safely inside during transport
Bottom tray with grooves for dividers
70% more tool surface area than Park’s BX-2.2 Blue Box Tool Case
A couple of questions about common disc brake issues came in recently. With discs on so many different bicycle types today, it's a good topic to kick off 2018. Happy New Year!
Q: "My gravel grinder road bike has a dragging disc brake. I don't really feel it when riding. But, if I pick up the bicycle and spin the wheel, it's obvious the pads are rubbing because the wheel stops. This has to be costing me energy and speed on rides, so it's frustrating. I've had a few mechanics try to fix it. But, no one can seem to stop it rubbing. Can you help?"
Yuri
A: The type of rubbing Yuri describes can be missed when riding because it’s slight. But, as he mentions, if you lift the wheel that’s rubbing off the ground and give it a spin, you’ll realize straight away that the rotor (the metal disc attached to the wheel) is slightly rubbing, because the wheel will stop spinning much more quickly than the other wheel (unless it’s rubbing, too).
This isn't the type of rubbing caused by a bent rotor. That creates a major rub that’s easy to see because the rotor wobbles when the wheel is spinning. For information on fixing bent rotors, see the second question (below this one).
The type of rubbing I’m explaining how to fix here happens on straight rotors. It’s highly annoying because, while it’s only slightly dragging, it’s constantly slowing you down and wasting your energy. You can try squeezing and releasing the brake lever repeatedly, removing the wheel and reinserting it, gently flexing the rotor to try to push the rubbing pad away, even loosening and repositioning the caliper – but the brake will usually still rub as soon as you brake again.
Fortunately, there’s a fix for this problem that almost anyone can do. All you need is the right wrench to remove the brake caliper from the frame and an ordinary business card. Don’t worry. You do NOT need to disconnect the brake hose/cable from the brake caliper or change any brake adjustments.
Tip: When working on disc brakes it's best to keep all oils (even from your hands), greases, lubes, etc. away from the brake pads and rotors. Lubes can contaminate and ruin the braking. If you make this mistake, to fix it, you may need to replace the brake pads and super clean the rotors.
To fix the rubbing, follow these 5 easy steps.
1. Remove the rubbing caliper from the frame by loosening and removing the two bolts holding the caliper in place (turn the bolts counterclockwise).
Before taking the bolts all the way out, be sure to note (take a photo) which one goes where and the order of any parts between the bolt head and the brake caliper. There may be washers or locking washers and one bolt may be different than the other. Be 100% sure you know exactly how the bolts and any parts go back on so you can get it right when you reinstall the caliper.
2. Now, hold the removed caliper in your hand. It’s still attached to the brake hose/cable, but there’s room to work on it.
Next, fold an ordinary business card in half and slip it inside the caliper as shown in the photo below. Depending on the size of the card, you might need to cut it down to fit.
3. Once the card is sized right and in place, wiggle and push the caliper back over the rotor so that the business card is in between the rotor on both sides and the brake pads, too (they’re tucked inside the brake caliper).
While keeping the caliper on the rotor, turn the wheel so that the caliper lines up to the bolt holes in the frame. Then, put the bolts back through the caliper, using care to put the bolts in the right place and any washers or tension devices in the right place, too. Refer to your photo. Screw the bolts clockwise until the caliper is loosely mounted back on the frame with the business card still in place inside the caliper.
4. Now, squeeze the brake lever and keep it squeezed while tightening both brake caliper bolts fully. If you're working on the rear brake, you might not be able to reach the bolts while holding the brake on.
So, ask a friend to help, or wrap something around the brake lever that keeps it firmly squeezed, like a toe strap or strong elastic band - the Bike Brake is handy for this.
5. Now that the caliper is back on the frame and tight, release the brake lever and squeeze it a couple of times as if braking.
Then, turn the wheel while holding onto the edge of the business card and the card will rotate with the rotor and come out. Once the card is out, you should find that your brake works nicely again with no more annoying rubbing!
Note that, instead of removing the caliper, you can try just loosening the caliper bolts. Then, removing the wheel and folding the business card over the rotor and reinstalling the wall and following steps 4 and 5 above.
The only thing is that it can be tricky on some bikes to get the rotor back into the brake caliper when the business card is on it - and to keep the business card in the right place on the rotor so that the card ends up exactly between all 3 things (rotor and both pads). You can do it if you're patient and careful but if you're not, you could get the card in the wrong place or even knock a pad loose.
In comparison, when you push the caliper over the rotor you can see what you're doing, the card will stay were you put it inside the caliper and it's less likely you will damage anything. But, both ways can work.
----------
Q: "Jim, not sure how this happened, but I bent my disc brake rotor. I know its bent because I can see the wobble and it wasn't like this when it was new. Is there a way to straighten bent rotors or do I need to have it replaced?"
Charles in the UK
Great question, Charles. Let's look at how rotors get bent first.
Causes
Rotors are the round, thin metal plates that attach to the wheel hubs. When you’re braking, the brake pads inside the brake calipers squeeze the rotors, providing excellent all-conditions slowing and stopping power.
If you’re lucky, your rotors will remain almost perfectly straight and you’ll never have to worry about them until they’re worn out, which can take a long time. But, if you’re unlucky, many things can bend the rotors.
For example, you could have a stick come up, get stuck in and bend the rotor. Or, on a long descent, you might hold your brakes on too long and heat a rotor enough that it warps. Another one is having someone at a rest stop mistakenly lean their bike against yours without realizing that their pedal is going to slam into your rotor when they let go.
Fortunately, these types of bends are usually fixable. What’s required is straightening the rotor. It’s a good skill to have because it’ll save money and let you keep riding instead of having to shop for new parts.
Tip: You can always replace bent rotors with new ones if you can’t or don’t want to try straightening them. They aren’t overly expensive. Just be sure to do your homework and get the same type you had.
Inspecting rotors
Before assuming a rotor is bent, check that there aren’t other problems causing it to only appear bent. Rotors are held on with lockrings or bolts. If these loosen, a rotor can wobble and look warped when all that’s needed is tightening the rotor bolts or lockring.
You might also have a wheel that’s not fully tightened in the frame. Check the quick release or through-axles to make sure. Or, a wheel might be off-center in the frame or fork, which can make the rotor look too close to the brake, causing you to think it’s bent. In that case, all that’s needed is loosening and centering the wheel.
Another glitch that can make a rotor wobble when it’s not bent is loose wheel bearings. To check for this, grip the wheel near the fork or frame stays (rear wheel) and push and pull gently sideways.
If the wheel bearings are correctly adjusted, the wheel will not move side to side when you do this test. But, with loose bearings, a wheel will move, and sometimes a lot. The cure is to remove the wheel and adjust the bearings to eliminate any play.
When inspecting rotors, if yours has a compound bend, or is bent so badly that it almost has a crease or fold in it, it is probably beyond repair. The bends that are fixable can be significant, but only smooth bends, not actual damage to the rotor. So, if you see twisted or folded or crunched rotors, you should replace them because they’re likely beyond straightening.
Straightening
Once you’ve determined that you for sure have a bent rotor and not a seriously damaged one, you can try to straighten it – or you can say “true it.” It’s a trial-and-error process that takes practice to master. It’s not difficult, but it can be frustrating and require patience and a good eye.
You can true rotors while the wheel is on the bike. For a tool, I use and highly recommend Park Tool’s DT-2 Rotor Truing Fork (about $20). You can see in the photo how this tool has two ends that slip over the rotor for excellent and precise leverage.
Park’s tool is heavy and fits perfectly so as not to damage the rotor even when you pry on it pretty hard. That’s usually what it takes to get a wobble out. If you’re new at it, you’ll get a feel for how you have to bend the rotor well beyond where you thought it would go straight to get it to improve, because the metal wants to rebound more than it seems it would.
You can slip the top of the tool over the top of the rotor to pull out or push in to remove a side-to-side wobble. You can also use the end with the short horizontal slot to remove a twist in the rotor by slipping that notch over the twist and pulling or pushing the tool as you hold it 90 degrees to the rotor. Another use of the horizontal slot is to slip it through the rotor and onto one of its “legs” to straighten lower bends.
Don’t rush it, and pay attention to the changes you’re making, and you can get good at straightening rotors. If it helps, you can mark the bent area of the rotor so you can keep track of your progress. Just be sure not to use anything that’ll compromise the braking surfaces.
Sighting the wobbles
One of the challenges of straightening rotors is seeing/finding the wobbles. With the wheels on the bike, you can sometimes sight through the brake and watch the rotor come through. If so, you’ll be able to see the rotor move left and right in relation to the brake pads, and be able to stop the wheel at that point. You then rotate the wheel to bring the wobble outside the brake so you can straighten just the right spot.
If you’re having trouble seeing the wobble through the brake, try putting a piece of white paper in your line of vision behind the brake caliper – or have a friend hold one up. Another trick that can work is holding a flashlight just so, to light the inside of the brake so that you can spot the bends.
Reading further, you’ll learn about the only tools I’m aware of specifically designed to make rotor truing much easier and super accurate. They’re great tools. But if they’re beyond your budget or needs, you could maybe copy how they work and rig up a pointer on your fork or frame.
Something as simple as a pencil for the pointer and a rubber band to hold it in place might do the trick in a pinch. If you come up with something that works well, please comment below and share it.
The gold standard in rotor truing tools
If you’re straightening rotors on a regular basis, you can save yourself a lot of time and do an even better job truing them with one or two more cool tools from Park, their DT-3 Rotor Truing Gauge (about $40) and DT-3I.2 Dial Indicator for DT-3 (about $40). See the photo.
Note that in order to use the DT-3 and DT-3I.2 Truing Gauges, the wheel with the bent rotor is removed from the bicycle and placed in either Park’s TS-4, TS-2.2, or TS-2 Professional Wheel Truing Stand ($230 - $372), which are all pre-drilled for the gauge to bolt onto.
If you have another brand of truing stand, it might be possible to drill it to accept Park’s gauges.
With the wheel held securely in a truing stand with one or both of Park’s gauges attached (the photo shows both), there’s no need to try to sight through the brake caliper. Instead, you locate the wobble with the gauge’s indicator and straighten each wobble with the Park Truing Fork.
It still takes time and patience to find and true wobbles, but because the indicator shows you exactly how true the rotor is becoming, the trial and error is greatly reduced. It’s super satisfying when you end up with nice true rotor and a disc brake that works perfectly again.
Here’s an excellent video on rotor truing with Park Tool tech whiz Calvin Jones
Here's hoping your disc brakes work like a champ from here on, Jim