Happy
Tour de France season everyone. Hope your cycling summer is in full spin. Here are some recent technical questions and answers I think you'll like.
Q: Hi Jim,
I have a pair of Rolf Prima Elan Aero wheels and am about to change a dinged spoke. I am a competent mechanic and have successfully built standard wheels before but have never delved into the ultralight, high-tension, paired-spoke designs. I am looking for any guidance you might offer, but my specific concern is the effect of removing the single spoke without detensioning the whole wheel (something I don't really want to do). The spoke in question is just slightly dinged (and I don't trust it to ride on) but the wheel is completely true. Do you see a problem with just swapping out the spoke?
Thanks for any help... keep up the great work,
Tracey
A: Great question, Tracey,

On the spoke - if it just has a tiny nick, it’ll probably hang in there indefinitely. I’m riding on 8 spokes like that right now and just haven’t got around to fixing them. A stick jammed in my rear derailleur and that brought it into the wheel, munching the spokes.
Mine are DT Swiss spokes, which are very strong so I’m betting they won’t break even though they’re all gouged pretty good – but I do have 32 spokes in this wheel, which is a lot and that helps.
So, to be 100% safe, you would replace your spoke. As long as you don’t cut the bad spoke out you shouldn’t do any damage to the wheel removing it. Just unscrew the nipple slowly and surely and remove the bad spoke. Then, install the new one. Be sure to lubricate inside the nipple and the outside of the nipple so it turns nicely on the spoke threads and on the rim, too. Also, press the hub end of the spoke down so it seats on the hub in case there’s any extra bend.
Next just gradually bring that spoke back to tension. Do this by ear. Pluck the spokes on the same side and listen to their pitch. Then tighten that new spoke until it makes the same pitch when plucked. In most cases, when the pitch is the same, the wheel will be nice and true as before. You probably won’t have to do any final truing - or just a tiny bit.
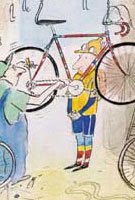
If you are really worried about stressing the rim removing one spoke, you could do this (photo): put the wheel back in the frame and turn it so that the bad spoke is right next to the seatstay. Then, wrap a toe strap (or tie) around the rim and stay on the same side as the bad spoke, and snug the toe strap. The toe strap will keep the rim from moving when you remove the spoke.
This will prevent any possibility of damage to the wheel at all and make it even easier to install and retension the new spoke,
Truely yours,
Jim
-------------------------------------------------------
Q: Hey Jim, I have a Trek mountain bike. I have slick road tires on it because I do road riding; no trails. I can get up to 20 mph at around 90 revs per minute. I would like to go from the 3 stock chainrings to two road-bike chainrings. What 3 chainrings - not brand, but how many teeth on the small one and how many teeth on the large one should I use? I live in Jacksonvile, Florida: Flatsville.
Thanks for your help!
Lee
A: This is a little tricky to answer because I’m not sure what model front derailleur you have on your bicycle or what chainring sizes you have now or what chain length you have, either. You might be able to just change the 2 larger chainrings on your bike to larger ones and simply raise your front derailleur higher on the frame to get it to clear the new, larger rings. But, usually if you go to significantly larger chainrings, you will need to add links to the chain too.
For example, a common mountain-bike triple-chainring combination is 22/32/44. Standards for the road are 39/53 and 34/50 (called "compact" chainrings). First you need to see if you can find road chainrings that will fit your MTB crankset (
bolt patterns differ). And, then you need to make sure that you can raise your front derailleur enough to not bump into the largest chainring. Sometimes they can be raised easily and sometimes they can't.
Another option would be to change to a true road double crankset. For this, you would probably need to install a new road bottom bracket to go with it. That’s the bearing assembly in the frame that the crankset attaches to. That’s usually required because the double crankset sits closer to the frame than the triple.
You’ll also need a new front derailleur that works with the road double crankset since you have a derailleur made for triple cranksets now. And, you might need a new left/front shift lever to get the shifting to work right.
So, the easiest thing to get higher gearing will probably be to figure out what the largest chainrings you can put on your bike are that won’t require a new front derailleur. You will still have 3 chainrings, but 2 will be bigger and give you the higher/faster gearing you want. A good bike shop should be able to look at your bike and help you find the right rings so that this upgrade doesn’t cost you too much.
Another way of looking at this is that if you mainly ride on the road and don’t plan to ride off road, instead of making any more changes (spending any more money) to your mountain bike, you could reinstall the stock knobby tires and sell it as a nice, used mountain bike. Then you could take that money and purchase a nice road bike that was ready to go for real road riding.
That makes sense because no matter how many changes you make to your mountain bike, it will always be designed mainly for off-road use. Lots of people turn mountain bikes into pseudo road bikes, but, while they work fine, they won’t match the performance of a true road bike. So,if you really want to ride the road a road bike makes the most sense in most cases.
Have fun dialing in your bike,
Jim
--------------------------------------------
Q: Hi Jim,
I am looking at replacing my worn out Diadora road cycling shoe with a pair of new Sidi’s. I have had the Diadoras for a while, having had them professionally fitted in a bike store using a bike-fit platform, where they marked the ball of my foot and corrected the orientation of the cleat to the shoe.
I was wondering if there was a way I can achieve the same result myself without having to consult the bike store again?
As a racing cyclist I have used the fit and adjust method over the years. That is, I have fitted the cleats where I think they should sit on the shoe, fixed them tight then ridden for a while, making slight adjustments each time. Obviously this method is far more time consuming than having them professionally fitted.
Appreciate your feedback.
Tony
A: Nice to hear from you, Tony, and sure, you can fit your cleats yourself to your new Sidi shoes. All the new space-age fitting methods are pretty cool and very helpful for people who need them, but people have been fitting cleats to bike shoes for a hundred years without them and doing just fine, so they’re not essential.
There are only 2 steps: 1) get them in the right position so the ball of your foot is over the pedal axle; and 2) make sure they are at the right angle so that the pedaling feels neutral (no pain or discomfort in your knee).
I have a cycling shoe cleat adjustment page on my website with more
detailed step-by-step instructions you can follow hereHope this helps and let me know if you have any questions!
Jim
----------------------------------------------------
Q: Hello, Jim. I really enjoy your website and have referred it to others like myself who are just getting into riding. I like to ride but can't get used to all the shifting so I always stand when climbing a steep grade. And all the slipping, etc. makes me uncomfortable. I'm 57 and too old to change my ways. There are bikes I've seen sold with rear hub gears. But with only 7 or 8 speeds that these drivetrains have, will I be able to adapt to the selected ratios given, compared to a 21- or 27-speed road bike? How much difference in the gearing is there?
Thanks!
Tracey
A: I’m not sure how to answer your question, Tracey, because you said you can’t get used to shifting your bike, but then you said it’s always slipping. A bicycle’s gears shouldn’t slip. That suggests that they’re not adjusted correctly. And, any gears, if they’re not
adjusted correctly (even bikes with hub gears) will give you problems.
So, the correct solution is probably not to spend a bunch of money buying a new bike to get a different gearing system that can also slip, but to have your bicycle checked out to adjust it and stop it from slipping.
So, that’s one option. But, when you said “slipping” you might have meant that you just don’t like the way derailleur gears work. They work by moving the chain across the different gears. This can feel funny if you’re not used to it, or if you don’t know how to shift correctly. The key thing to remember is that you need to keep the pedals moving in order to shift, but you NEVER put any pressure on the pedals during the shifting. You aren’t pedaling to move the bike down the road. You’re just pedaling super easily to move the chain so it can climb onto the next gear. You wait for the chain to find the gear and seat on it, and then you can apply pressure to the pedals again.
If you try to shift when you’re halfway up a hill and you have pressure on the pedals to climb the hill, the chain could slip or make noise. The key is to shift BEFORE that steep part so that you can take the pressure off during the shift, let the chain find the next gear and then you can apply pressure again.
The more modern the drivetrain the smoother the shifting. But, it has to be adjusted right too. Bikes sold by bicycle shops will be adjusted right. Bikes sold by department stores will not be adjusted right (they don’t employ bicycle mechanics).
If you don’t like the feel of a derailleur drivetrain, with the chain moving all the time, or don’t like having to shift right and left levers, a hub gearing system can be a nice alternative. These have been around forever and they work great. But you’re right that they generally provide fewer gears. Typically you have one lever on the right side and 3 to 8 gears available from the rear hub. You simply click the lever and with each click one way it gets easier to pedal, and harder with each click when you move the lever the other way.
Hub gearing typically comes on bicycles that weigh more than the same bike with derailleur gears and more weight means more effort to pedal the bike. So, it really depends on where and how you ride your bike in determining whether hub gears make sense or not.
They’re pretty ideal for shorter, flatter rides and utility cycling where you ride into town and back or around town. They’re not so good on hilly terrain or long rolling rides where you need to shift a lot and use a wider range of gearing. Note that hub gearing comes close to having the same low and high gear as a derailleur drivetrain but there are less choices in between that high and low since you only have 8 gears, or so.
If you told me how you plan to use this bike, I would be able to better answer if hub gears make sense for you. But, the other thing you could do is visit a bike shop with these bikes and take a test ride to see how you like it on one of your rides. I think you’ll really enjoy the shifting since it’s much simpler than derailleur shifting. I just don’t know if it will provide the gearing you need for the typical riding that you do.
My hub-gear bikes are my city bikes. I wouldn’t take them on a 30-mile hilly ride, but they’re great for getting around town, to the beach and all over the neighborhood.
To smooth shifting,
Jim
-----------------------------------------------------
Q: Hello Jim,
I've started commuting again on my bike after a layoff of a few years. So I'm doing my tune-up today in the sunshine. Your website is very helpful, I'm really learning a lot.
I have one problem. I cannot adjust my rear brake cable at all. I think this is because when I got the bike a decade ago, I had the drop handlebar fitted from my previous bike, with the safety levers (which I do like). But the rear brake caliper wasn't changed, so I have no adjuster on the lever and no adjuster on the caliper.
So how can I tighten the rear cable? Any suggestions? Strangely, there is an adjuster on the front cable, above the caliper, with a lever to loosen it.
Hope you can help,
Jon
A: Hi Jon,
Congrats on commuting by bicycle again. Good for you! Here are some tips on your brake:
If a brake has no adjuster, the way to
adjust it is with the cable. So, what you do is keep trying different cable adjustments until you get the brake operating the way you like it. You do this by loosening the cable anchor bolt on the brake and pulling the cable through to remove slack, or letting a little cable slide through to create slack so you have more room between the brake pads and rim.
One adjustment trick that may help you is to make shims or spacers – 2 pieces of cardboard work nicely. Take these shims and put them beneath both brake pads. Now, hold the brake closed, pull on the cable to remove all slack and tighten the cable anchor bolt. Next remove your cardboard shims. That should give you a nicely adjusted brake where the pads clear the rim and still offer nice, powerful stopping power too.
Hope this gets those stoppers working great!
Jim Langley