 |
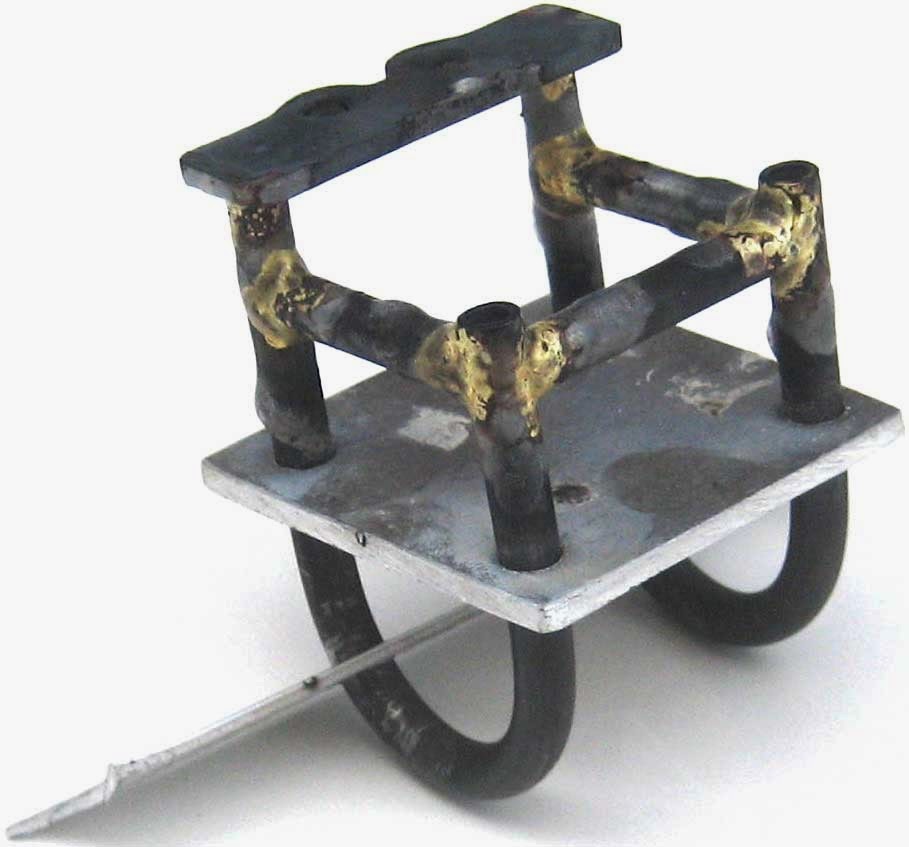
| Before brazing |
If you visit this page of the website with the best archive of Herse bicycle photographs, and if you look closely at how the handlebar bag attaches to the stem, you can see an original. There's also an illustration below that shows how cleverly it works.
If you are looking for a modern version, you should visit this page on Compass Bicycles to see their decaleurs, which are Japanese-made and beautiful quality.
My bicycle was missing this crowning touch for the front of the bike. I purchased the Compass Bicycle version and it worked great. But then I saw the photo I linked to above, of the genuine Herse decaleur and I couldn't stop thinking about it and decided I had to have one like it on my bike. A couple of months later I have one.
To explain how it attaches to the bicycle, It mounts beneath the custom Herse stem on its twin bolts. You can just see the holes in the second photo. They're covered by masking tape in the first photo.
I'll somehow mark it so no one thinks it's an original piece, probably by etching some text beneath the plate that mounts to the stem bolts. I may use a vibrating writing-on-metal tool. Or, maybe I'll just write beneath the flat piece with a Sharpie and make it easy!
 |
| After brazing |
Without any type of official tubing bender, the most difficult part was bending the chromoly tubing. I made a form to bend it over by hand.
It's not easy bending small-diameter quality tubing without crushing it. I had to buy several different wall thicknesses and ruin some tubing before I figured out what worked. I also built several different bending jigs and tried a couple of tubing bender tools before I made something that worked.
It's not easy bending small-diameter quality tubing without crushing it. I had to buy several different wall thicknesses and ruin some tubing before I figured out what worked. I also built several different bending jigs and tried a couple of tubing bender tools before I made something that worked.
I would like to have seen how they did it at the Herse shop. There are some wonderful photos of the shop during the period my bicycle was built and also of Jean Desbois who made my frame in Jan Heine's new and outstanding book on René Herse.
Too bad they weren't making decaleurs while those photos were being taken!
Too bad they weren't making decaleurs while those photos were being taken!
I tried several ways to make the U-shaped finishing front upright piece that you put into it to seal the open ends for riding without the handlebar bag (the other half of the decaleur is bolted to the handlebar bag - see photo links above).
I finally found an easy way to do it and you might be able to figure it out if you look at the finished decaleur photo closely. Hint: there's something slightly different about that piece.
Keep in mind that it won't be in the decaleur most of the time because the bag will remain on the bike mostly. So it's only for sometime and temporary use and I didn't feel it had to be perfect because of that, though I still wanted it to look almost perfect.
 |
| Ready for cleaning |
Keep in mind that it won't be in the decaleur most of the time because the bag will remain on the bike mostly. So it's only for sometime and temporary use and I didn't feel it had to be perfect because of that, though I still wanted it to look almost perfect.
Those pieces that appear silver/gray in my photos above are just aluminum holders that aligned and kept the tubing in position for brazing. The two curved pieces had to be kept in position or else they had a tendency to twist.
The other challenge was getting the ends to line up with each other perfectly. Luckily I had purchased the Compass Bicycle decauleur so I had the key piece that attaches to the handlebar bag with bolts and lets you slip the bag into the decaleur in seconds to mount and remove the bag.
Since that part fits tightly into the two open ends, it was the other essential that held the loops aligned for brazing. The aluminum alignment pieces have been removed in the photos below.
Scroll down past the text and you'll see how my decaleur looks ready to be mounted on my René Herse. The chrome plater did quite a nice job and amazingly turned it around in only 4 days!
The other challenge was getting the ends to line up with each other perfectly. Luckily I had purchased the Compass Bicycle decauleur so I had the key piece that attaches to the handlebar bag with bolts and lets you slip the bag into the decaleur in seconds to mount and remove the bag.
 |
| Sanded and ready for chrome |
Scroll down past the text and you'll see how my decaleur looks ready to be mounted on my René Herse. The chrome plater did quite a nice job and amazingly turned it around in only 4 days!

